Introduction
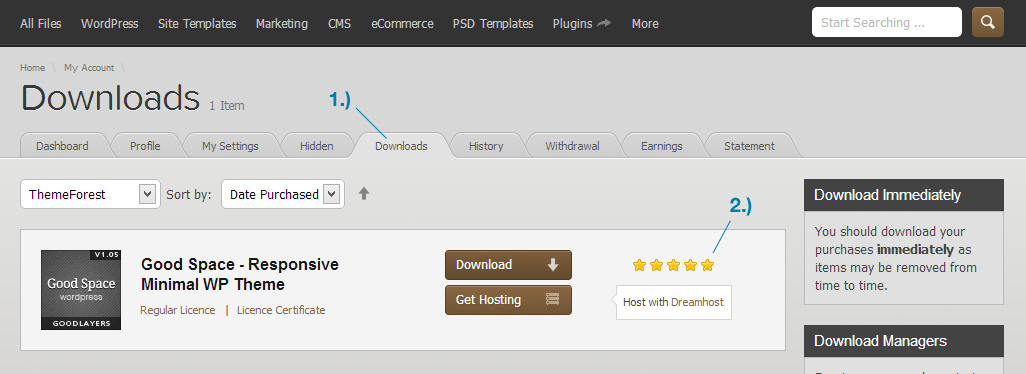
Thank you very much for choosing our theme. We truly appreciate and really hope that you'll enjoy our theme!Bought on ThemeForest? If you enjoy the theme, please support us with a 5-star rating on your Envato downloads page (How to rate?)
Need Support?
If you have any questions regarding to theme issues, please submit a ticket at http://support.goodlayers.com/ (Registration Required)Theme Installation
Recommended
If you bought from
GoodLayers.com · Direct purchase
- Download the installable hotelmaster.zip from your GoodLayers order — it’s in your purchase confirmation email and in your Freemius account.
- In WordPress go to Appearance > Themes, click Add New > Upload, choose hotelmaster.zip and click Activate.
- On the registration screen (if you can’t find it, go to GoodLayers > Getting Started on the left menu), use the GoodLayers Direct side: paste your license key (it starts with sk_) and click Activate My License.

That’s it — full features, demo import and automatic updates unlock right away. You can grab the demo & extra files any time from the Downloads & Resources panel on the same screen.

If you bought from
ThemeForest
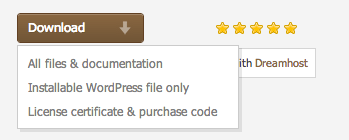
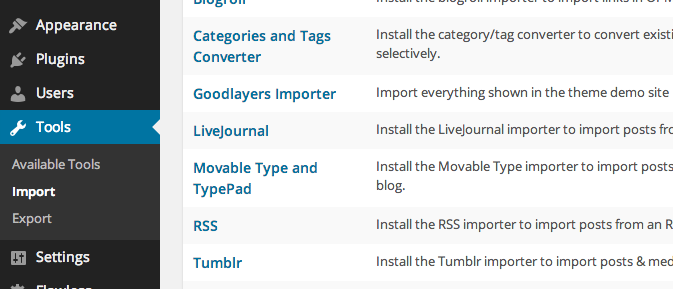
Once you purchase the theme from themeforest, you'll be able to load 2 file type.

If you already hide it out, you can go to 'Appearance > Install Plugins' section instead too.
- All Files and documentation
- Installable Wordpress Theme File
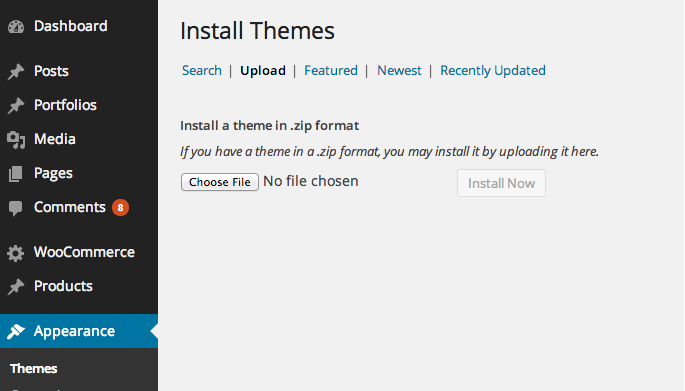
Install theme via Wordpress Dashboard
- Go to 'Appearance > Theme' section
- Click 'Add New' and select the 'Upload' option
- Upload the zip file
- All Done :)
Install theme via FTP
- Access to the file on your server using ftp editor program
- Go to 'wp-content/themes' folder
- Extract the zip file and put the themename-vxx_xx folder there
- Go to 'Wordpress Dashboard > Appearance > Theme' section to activate the theme
- All Done :)
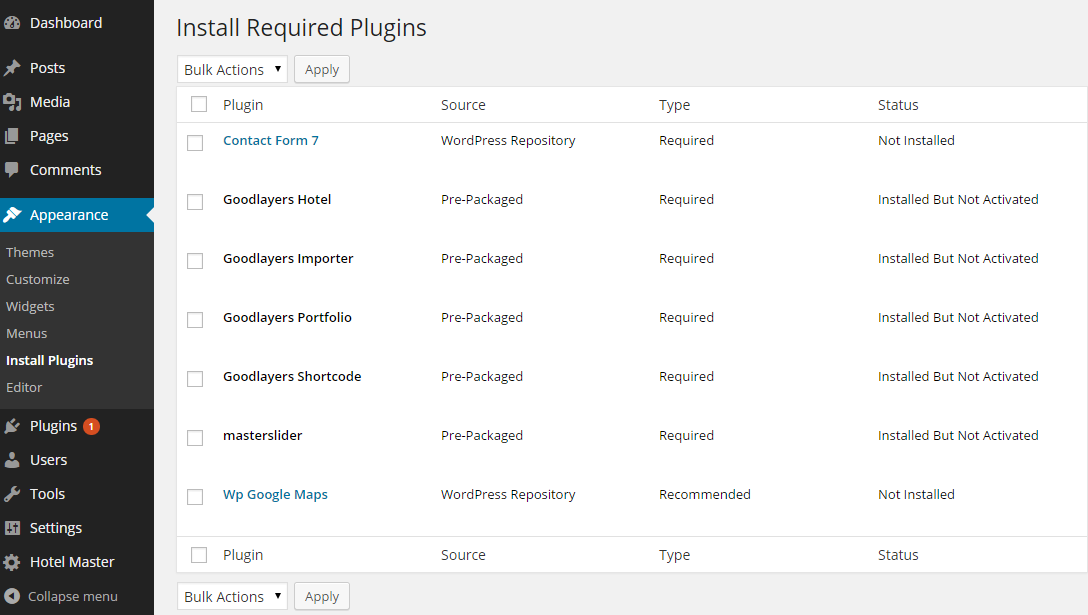
Install Plugins
After you install the theme, there'll be a list of suggested and recommended plugins at the top of the wordpress dashboard.If you already hide it out, you can go to 'Appearance > Install Plugins' section instead too.
Importing Demo Content
After activating the theme, there'll be suggested plugin listed at the top ( if there aren't, you can go to 'Appearance > Install Plugins' section as well ).Try installing and activating these following plugins ( as it effects the importing process ). You can also install all suggested plugins at this step as well.
- Goodlayers Importer
- Goodlayers Portfolio
- Goodlayers Hotel
- Woocommerce ( optional )
- Contact Form 7 ( optional )
Follow the steps mentioned on the screen, then, you'll get the site like the demo :)
Setting up another homepage
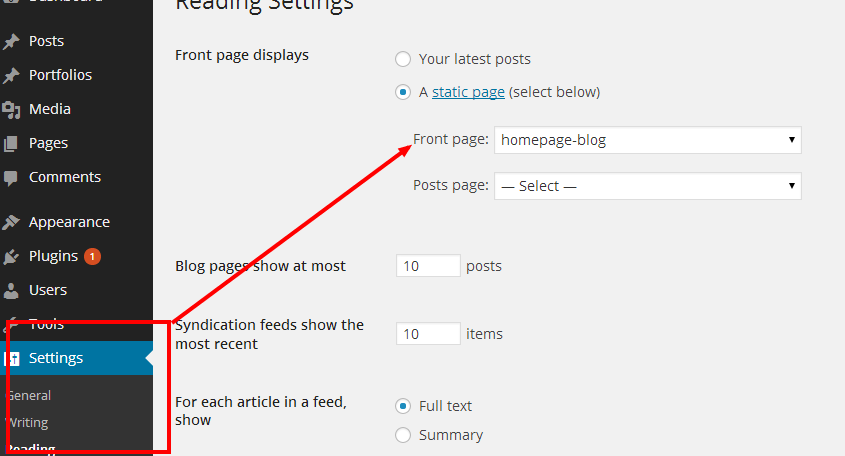
After importing the demo site, try following these stepsGo to 'Settings > Reading' to change front page to any page you want
Theme Translation
- try installing the 'Codestyling Localization' plugin. ( Can be found in 'Plugin > Add New' section )
- Go to 'Tools > Localization' section.

- Select our theme or plugin you want to translate to add new language
- Select the language of your wordpress installation ( Defined in wp-config.php file. Default is en_US )
- Click rescan, then edit the string
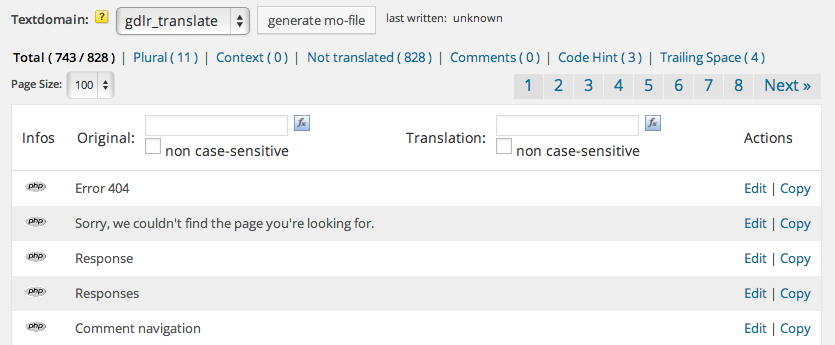
- Translate the word you want and click the generate .mo file button
Theme Customization / Updatation
Adding new style / script
There're an option at the 'Theme option > General > Page Style > Additional Style / Script' section ( You can add the code directly without any style / script tag )
Adding / modify php code
If you don't want to modify the theme files everytime you update the theme, you have to create the child theme to modify the php code for this. You can find the tutorial about how to create the child theme here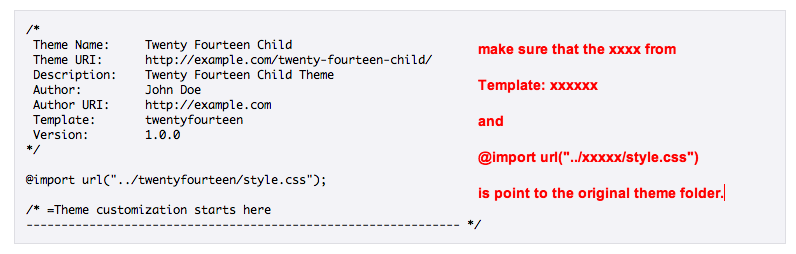
Our theme wrap every function with if( !function_exists('some_function') ) command, so if you want to use any function, just declare it in the function.php file of the child theme and it'll overwrite the existing one.
Updating the theme
There're no auto update function in our theme, so you have to manually install it again. Try following this steps for this.- Download the zip file from themeforest again
- Install it to different folder ( or just simply uploading via wordpress dashboard without removing the old one)
- Activating new theme version
- Set the menu to themes location at the 'Appearance > Menu' section.
- Save the theme option once
- Make sure everything is working properly and you can remove the old theme files out
Child Theme
To create child theme
If you don't want to modify the theme files everytime you update the theme, you have to create the child theme to modify the php code for this. You can find the tutorial about how to create the child theme hereOur theme wrap every function with if( !function_exists('some_function') ) command, so if you want to use any function, just declare it in the function.php file of the child theme and it'll overwrite the existing one.
Header Style
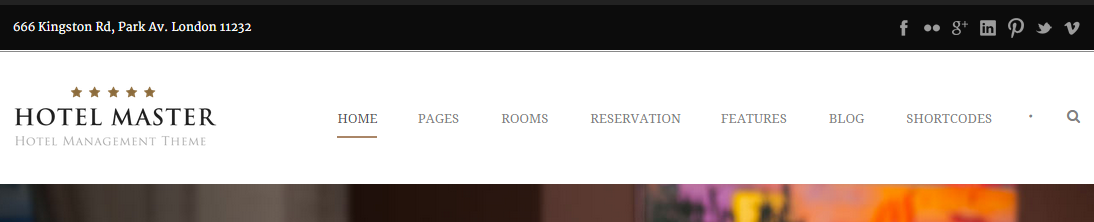
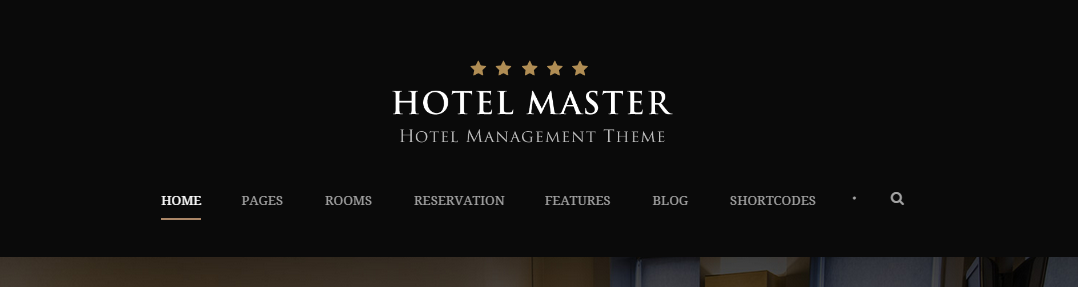
There're 2 header style in this theme which you can selected it at each page option. The default settings can be set at 'Theme option > Overall Elements > Header / Logo' section.Header Style 1
Header Style 2
Changing Logo
You can changing logo at the 'Theme option > Overall Elements > Header / Logo' section. You can upload 2x size image, then specifying the logo size to make it look sharp on retina device as well.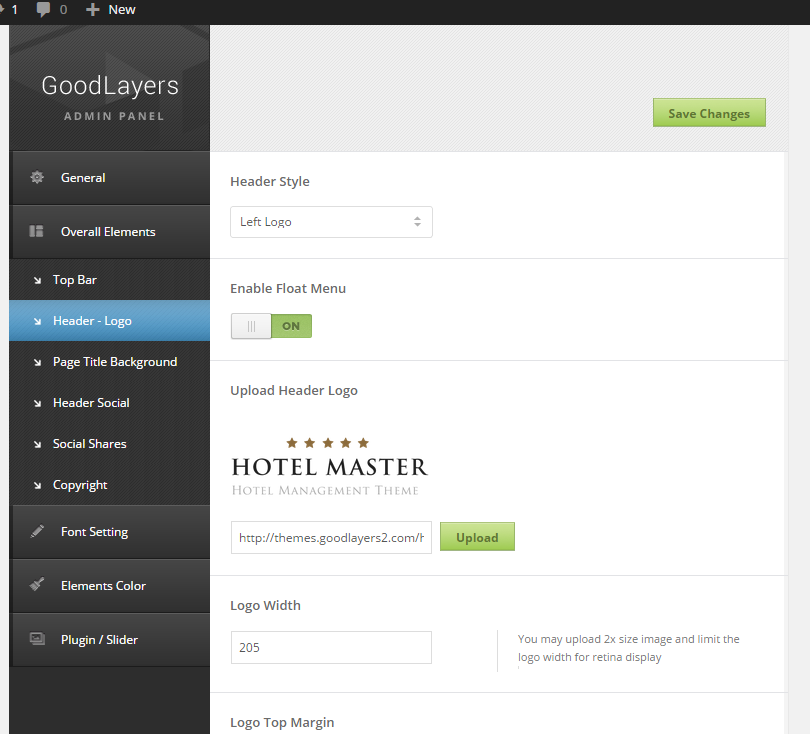
Creating Menu
1.) First Step
You can create menu by going to 'Appearance > Menu' section.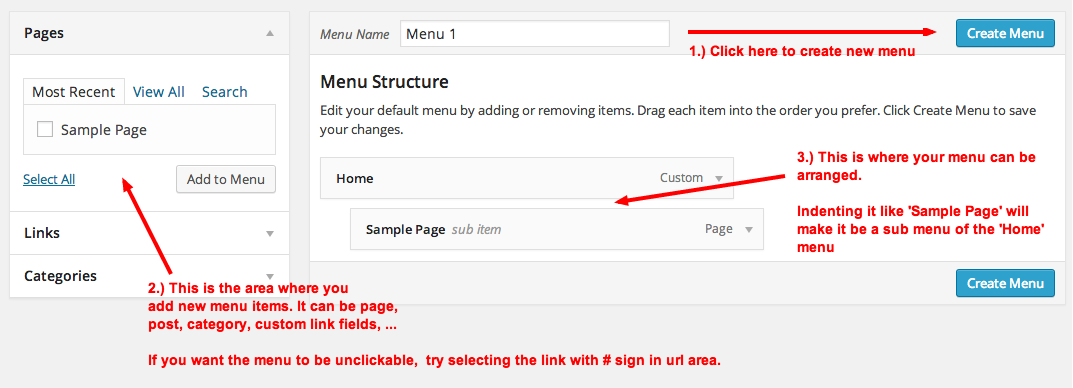
2.) Mega Menu
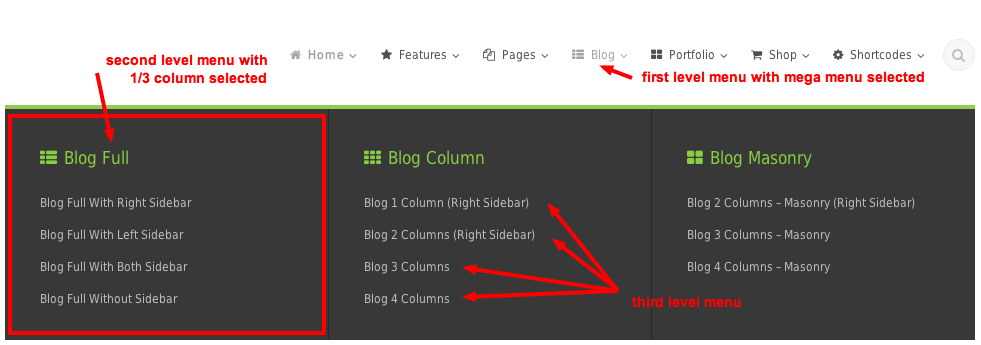
There're 2 submenu type in our theme. Normal submenu can be created by indenting the menu as the first screenshot. To create mega menu, you have to select the 'Enable Mega Menu' option on top-level menu, then select the column on the second-level menu.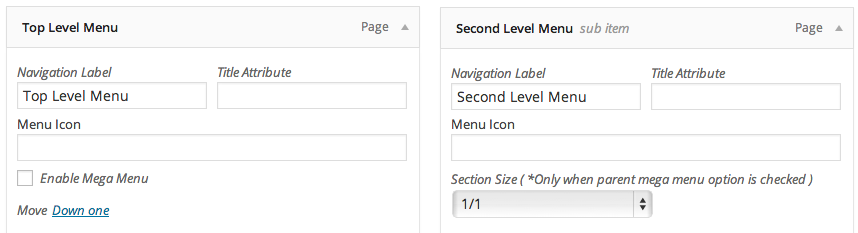
Here's the sample scenario of how the mega menu is created.
3.) Assign Menu
After you finished creating the menu, try assigning it to themes location at the 'Manage Location' section.
Creating Menu
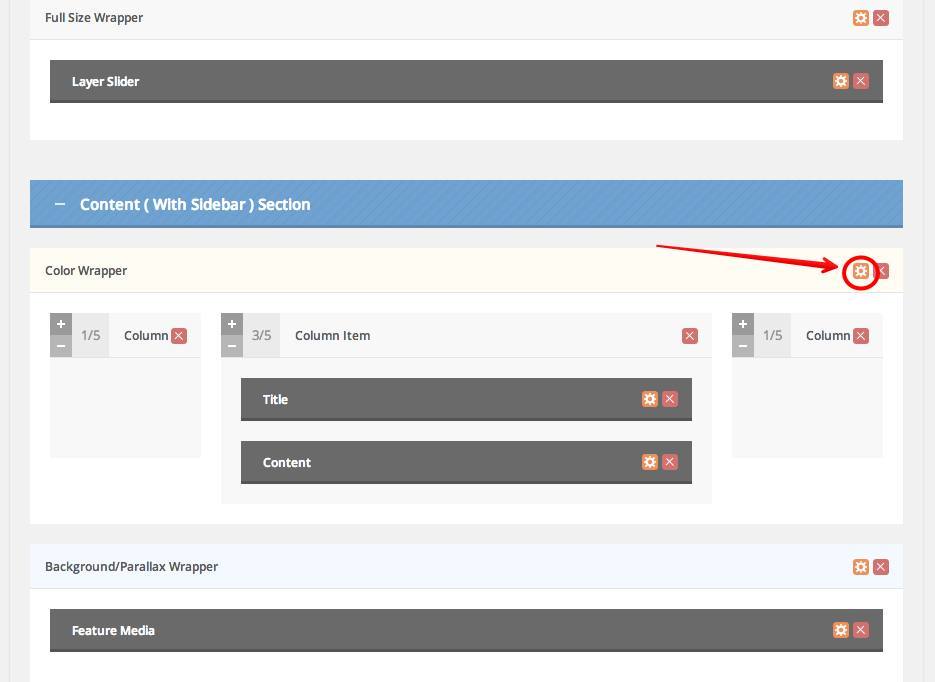
One-page website can be created by using page builder feature. The structure of one page is separated to each section by id '#'. In page builder structure, you can assign ID(#) to each page item. So bascically, to set up one-page website.1.) Create page and add page item, click on the orange gear icon
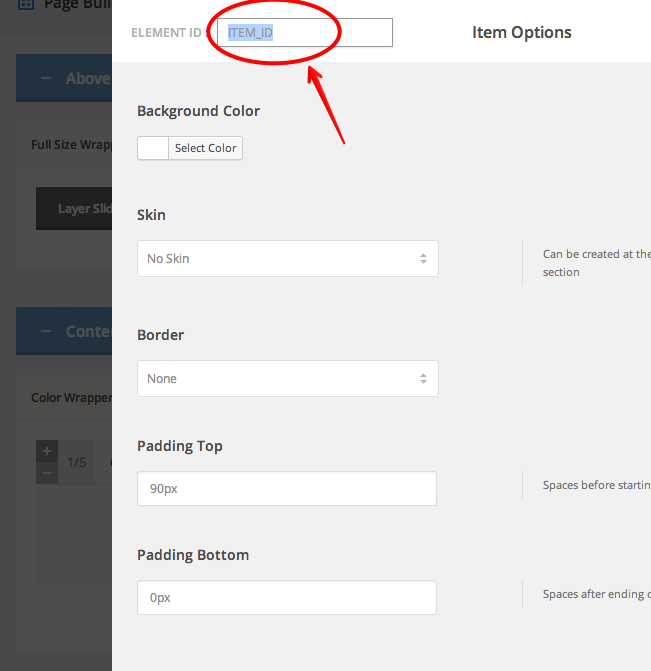
2.) Put your desire ID in ID field.
3.) Go to 'Appearance > Menu' and create a new custom link. Put ID that you put in ID field in page builder.(You must put '#' in front of your ID in menu.)
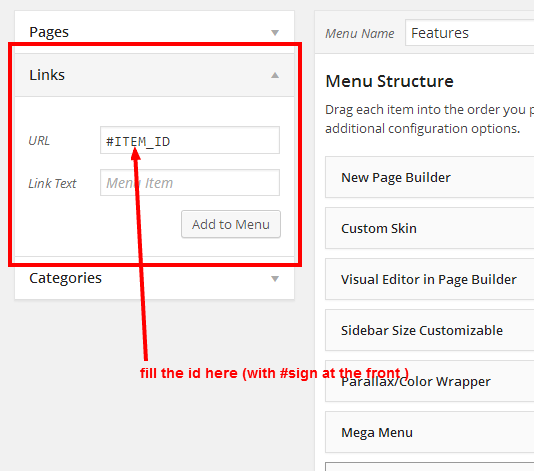
4.) Keep doing this in other section in page builder. So basically, if you need 4 menu, you have to separate your page builder to 4 sections using ID field.
Footer / Copyright
Footer
You can change the footer style or hide it at the 'Theme option > General > Footer / Copyright Style' section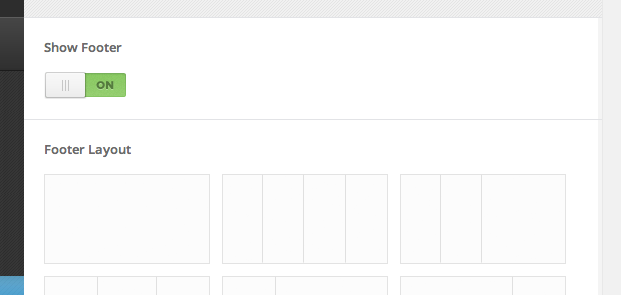
After that, you may assign the widget to footer 1 2 3 and 4 in the 'Appearance > Widget' area. ( BTW, if select the footer that has 2 columns, footer style 3 and 4 will not be any use. )
Copyright
Copyright area can be assigned by going to 'Theme option > Overall Elements > Copyright' section.Creating Homepage
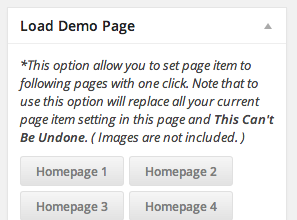
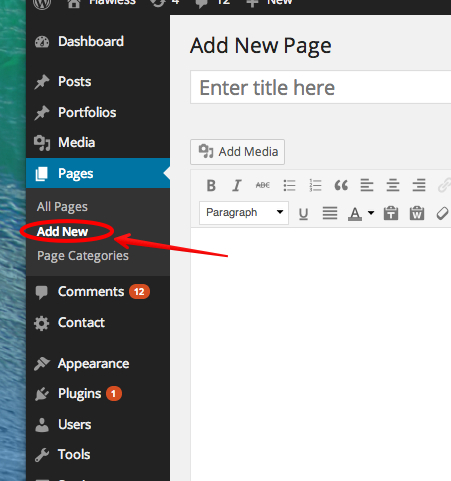
Go to 'Page > Add New' to create new page.You can assign the page sidebar, header background and attribute at the page option area ( Normally it's below where you update the page and select the page template )

You can also load the demo page scenario ( without images included ) at the 'Load Demo Page' section below the page option as well. Please use this option with caution that it will overwrite all settings in this page and this cannot be undone.
Set the page as Homepage
Go to 'Setting > Reading' area. Choose the front page as static page and select the page you want to be homepage.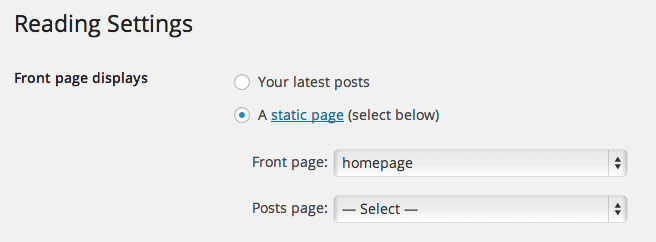
Creating Slider
There're 3 kinds of slider in this theme.- Master Slider
- Flex/Nivo Slider
- Post Slider
Master Slider
1.) Make sure that Master Slider plugin is activated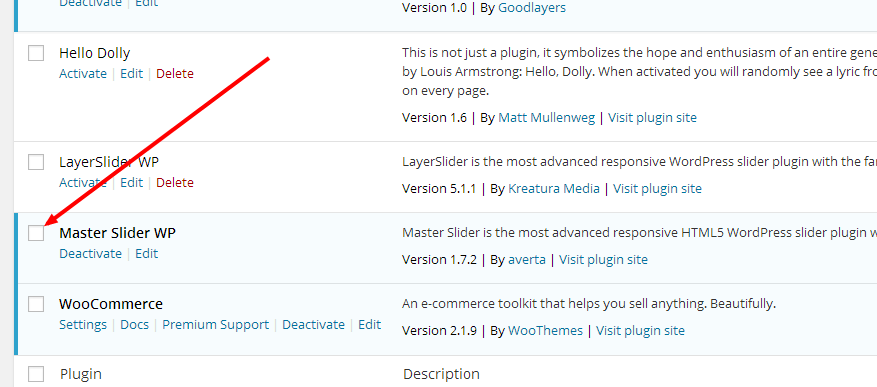
2.) You can learn how to use Master Slider via this video > http://www.youtube.com/channel/UCd4BlK14-aI_Pqh9L2SLD5Q Or this document http://masterslider.com/doc/wp/#slider-settings
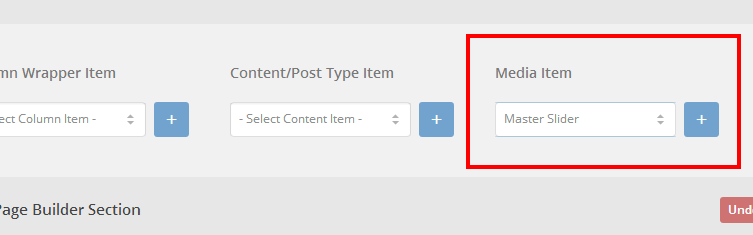
3.) Go to edit page that you need to put slider and add page item 'Master Slider'.
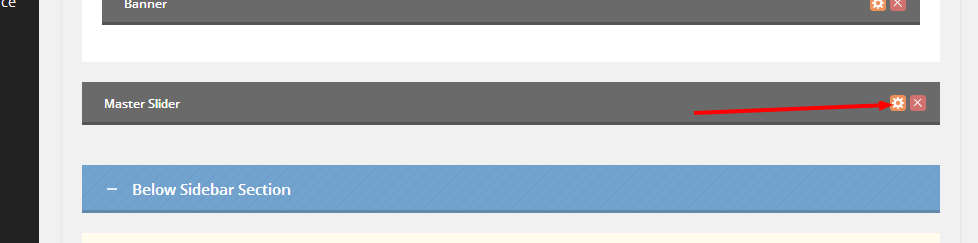
4.) Click on gear icon on page item.
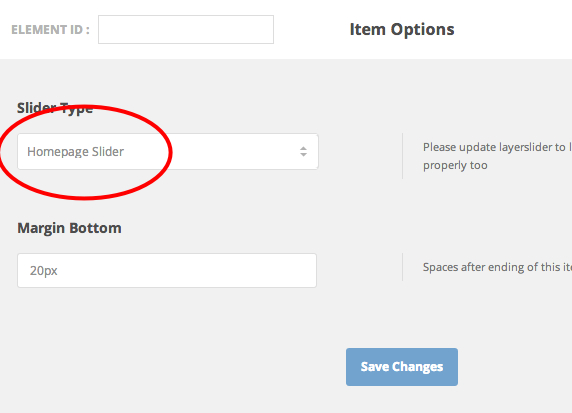
5.) Select slider name that you created in 2.)
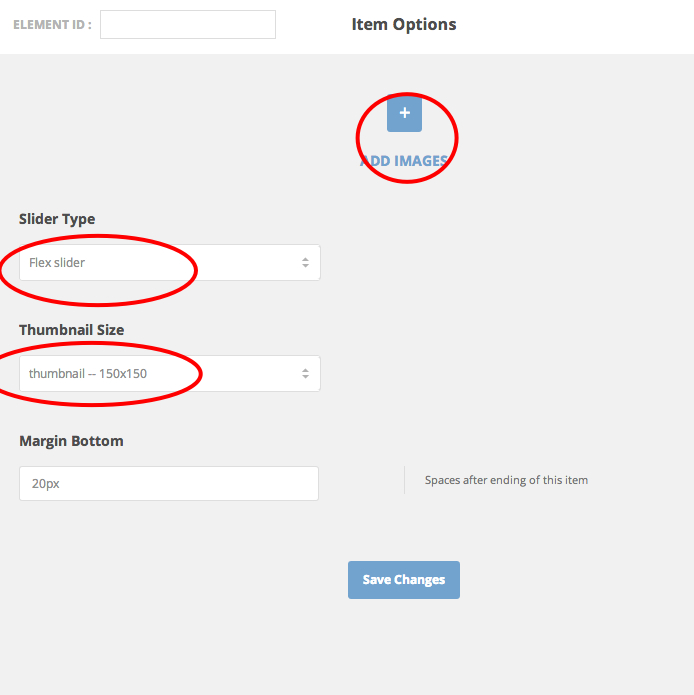
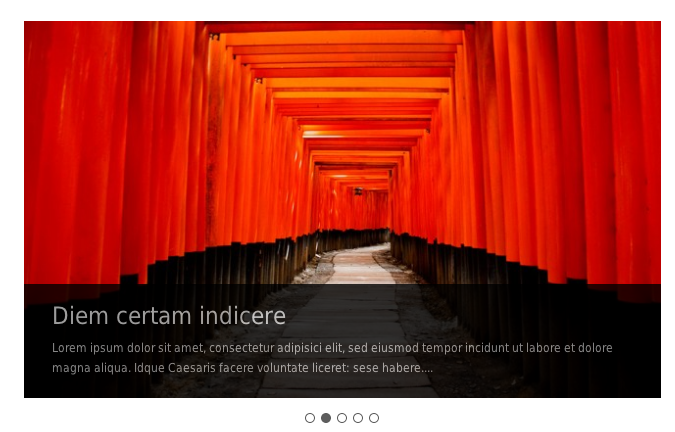
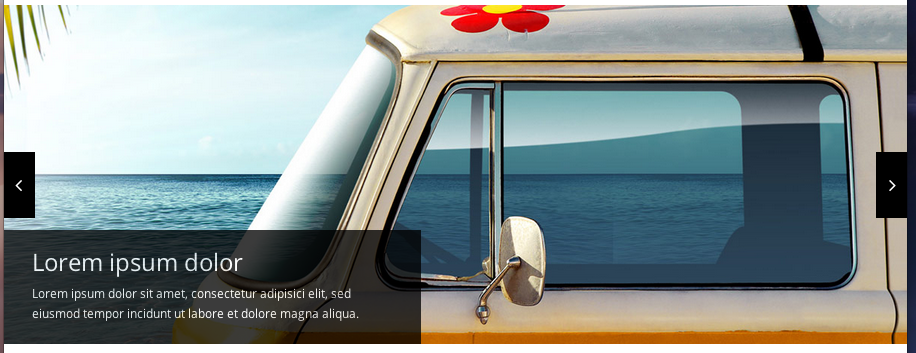
Flex/Nivo Slider
1.) Go to page that you need to put slider and add page item 'Slider'.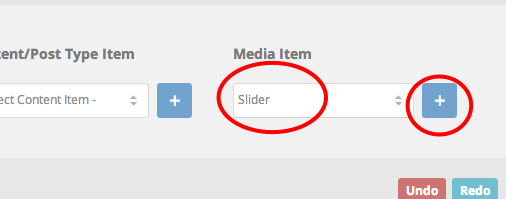
2.) Click on the gear icon on page item to choose option.
3.) Add images, select slider type and choose thumbnail size.
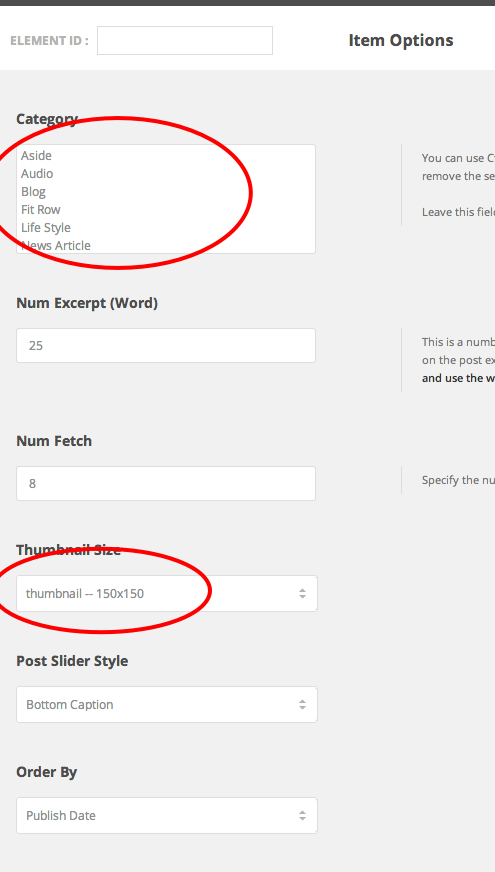
Post Slider(From Blog Posts)
1.) Go to page that you need to put slider and add page item 'Post Slider'.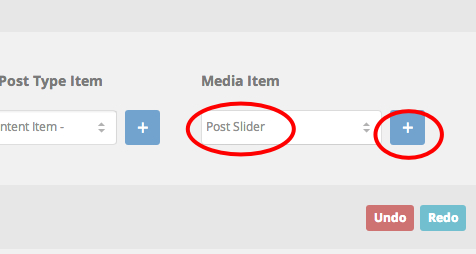
2.) Click on the gear icon on page item to choose option.
3.) Select blog category, thumbnail size and other options.
Sidebar Creation
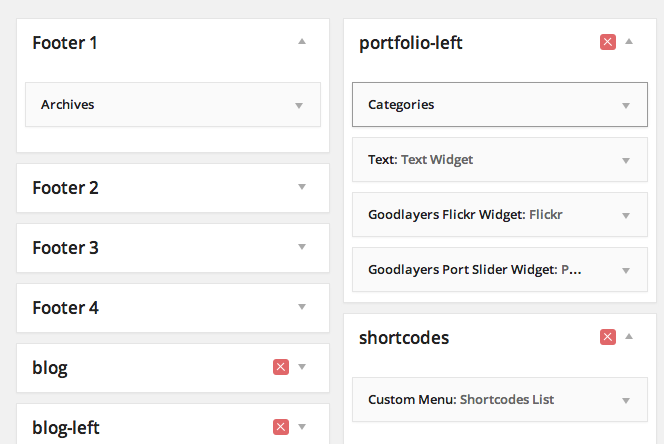
Sidebar can be created at the appearance > widget area.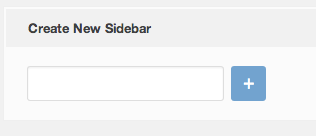
After you create new sidebar, you can drag any widget into it to fill the content. ( red cross button allow you to remove that sidebar out. )
Assigning the sidebar
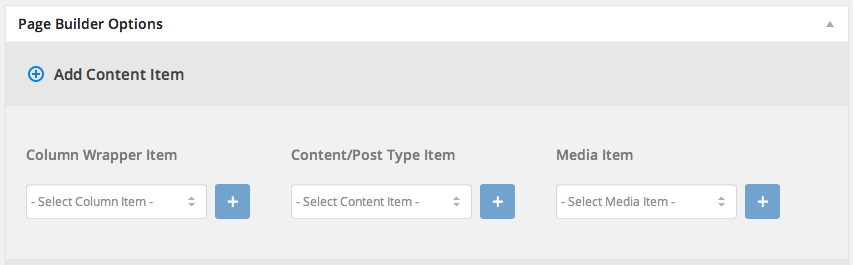
After you create sidebar, you can assign it to any page/post/portfolio you want in the page/post/portfolio option area. You can also set the default sidebar for blog page, archive/search page, woocommerce product and woocommerce single page at the 'Theme option > General' section as well.Page Builder Component
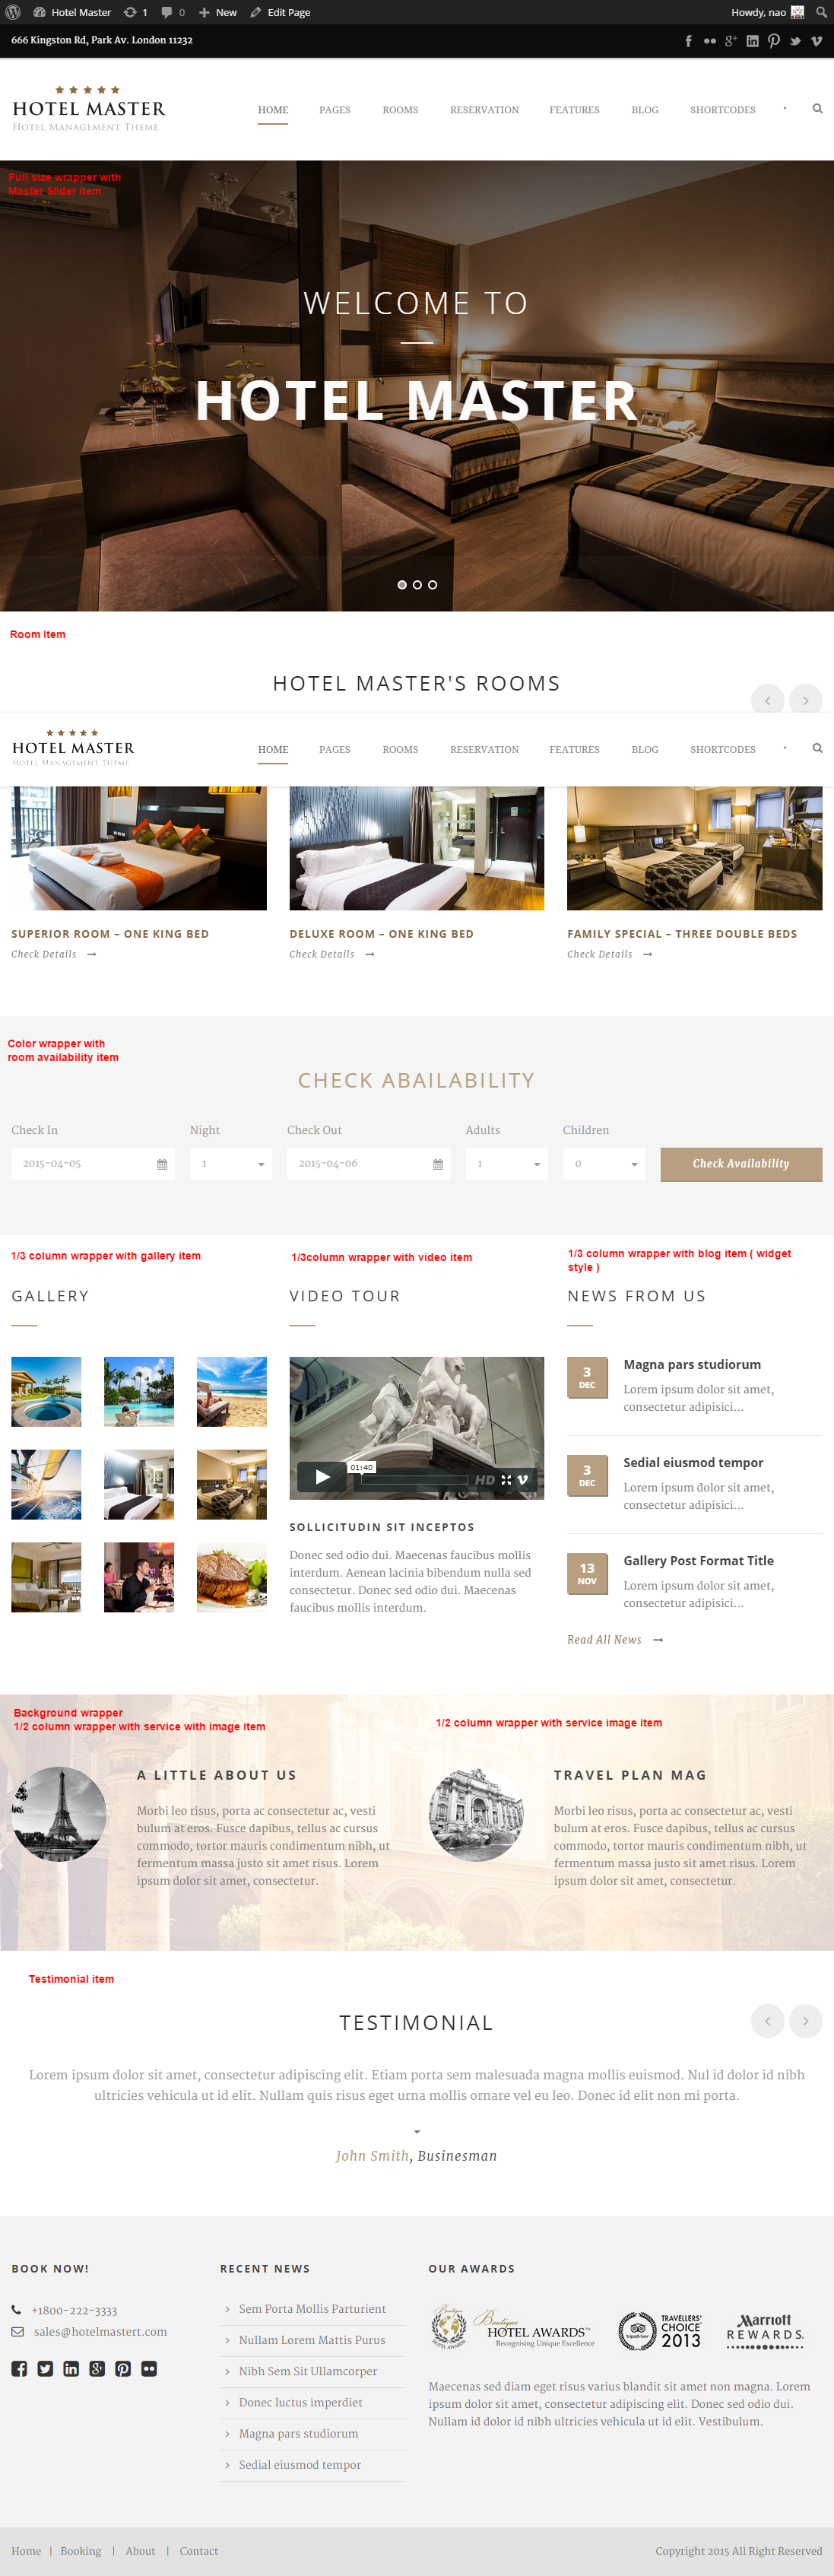
Page builder divided to 3 types- Wrapper Item
- Content / Post Type Item
- Media Item
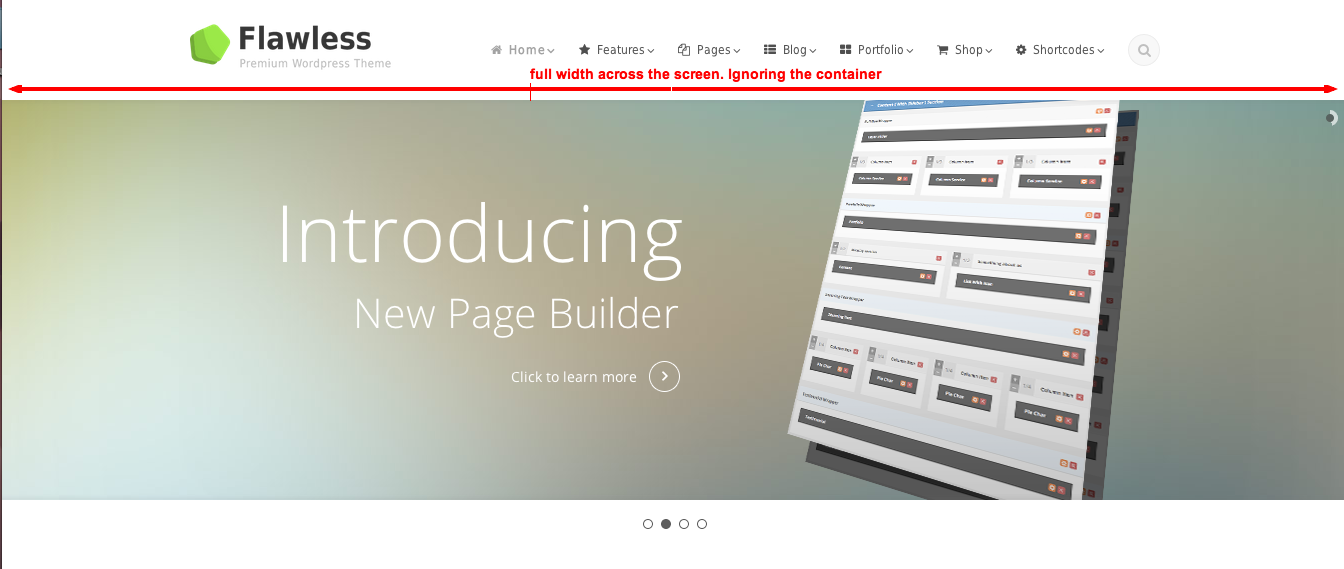
Wrapper Item
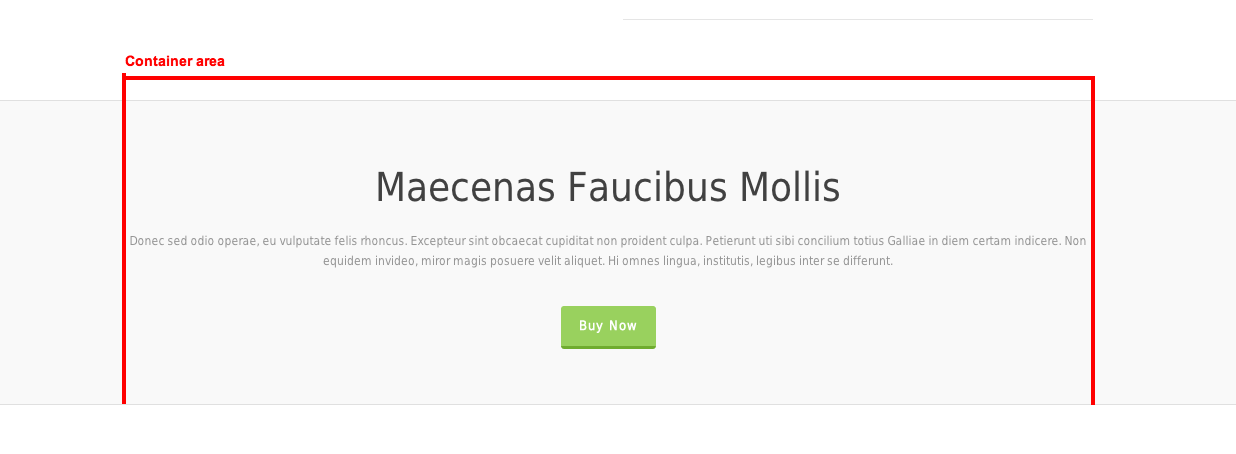
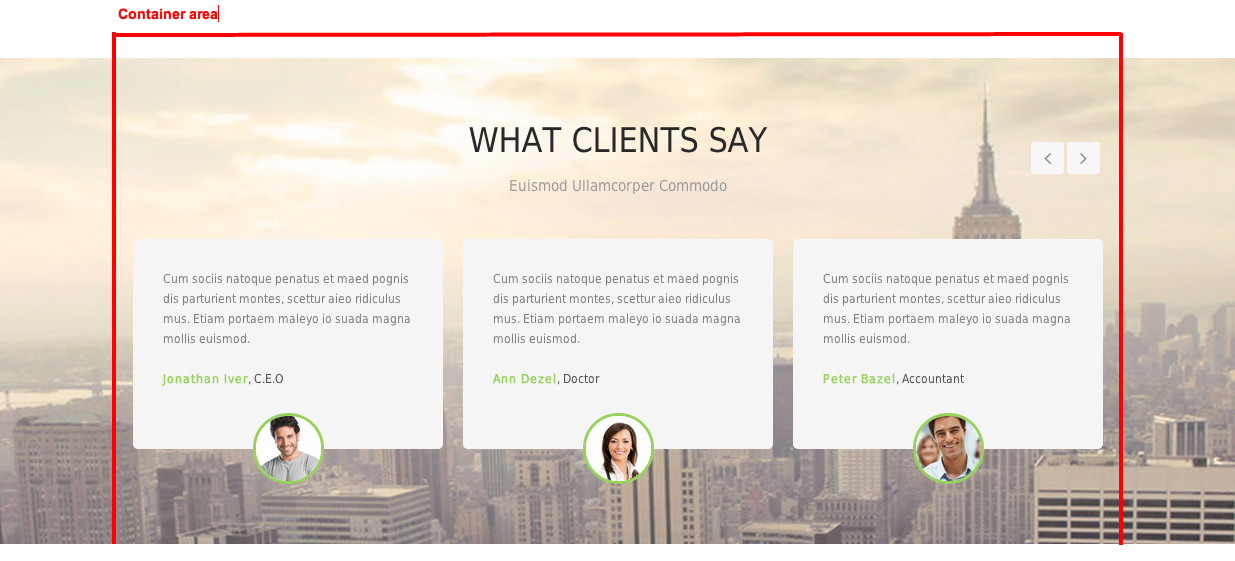
Wrapper item is the container which allow you to changes the size, layout and style of the displayed item. It divided to 4 different main component.- Full Width : Allows you to display the content out of the container area. ( full width across window screen )
- Color Wrapper : Allows you to changes the section background color.
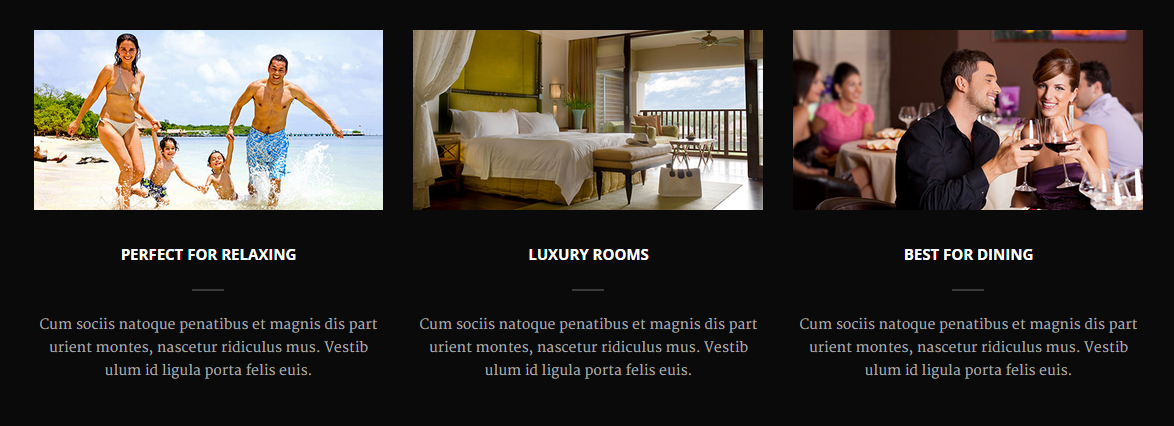
- Background Wrapper : Allows you to put custom image or select predefined pattern as background. There're also option to move background while you scroll ( parallax ) the site as well
- Column Wrapper : Allows the ability to divide the item to columns. Can put this item inside Background Wrapper and Color Wrapper
Content / Post Type / Media item
This is an item which display the actual content on your site. You can put these item within the wrapper item. Here's the list of all content / post type and media item ( you can click the link to view image in lightbox )Content
Box Icon
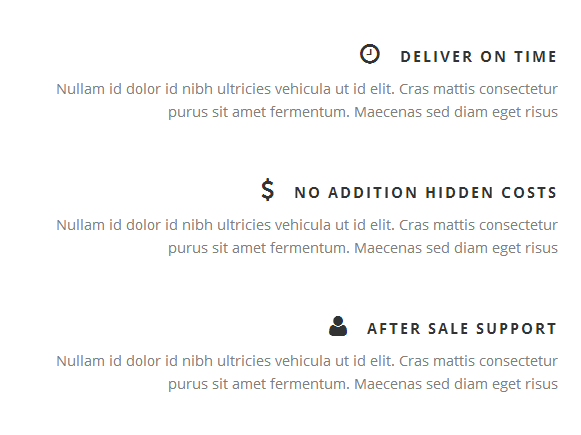
Column Service
Divider
Feature Media
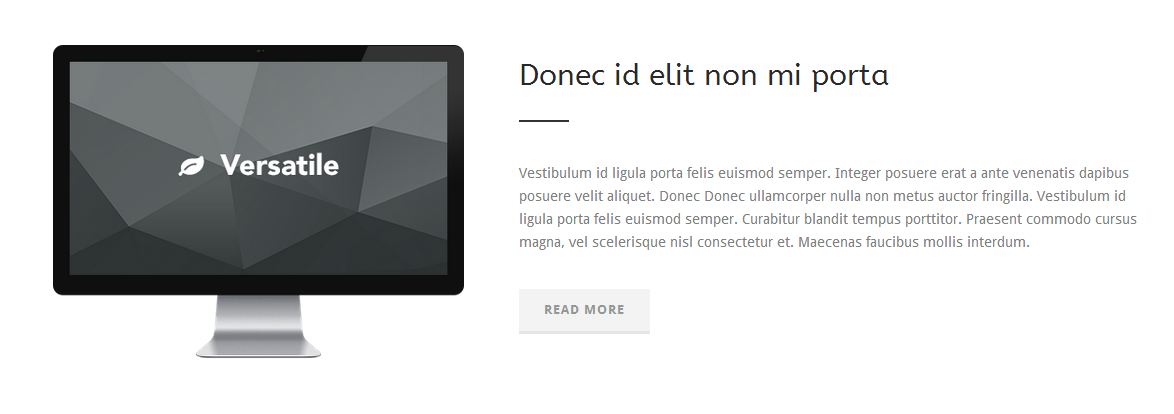
Notification
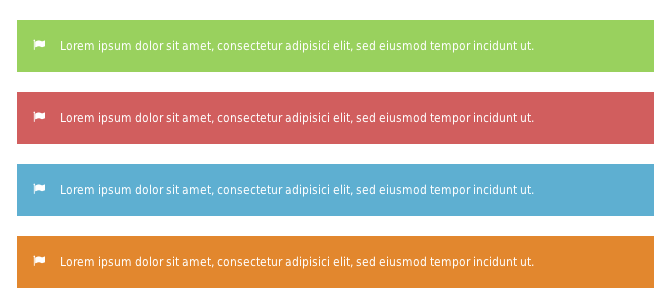
Pie Chart
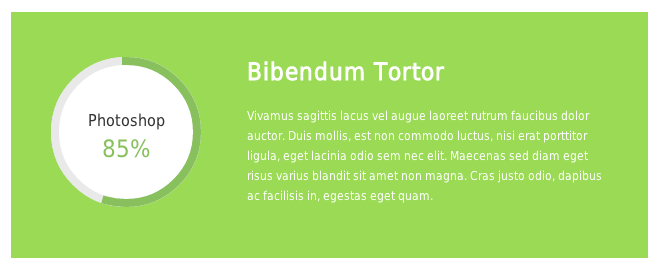
Service With Image
Stunning Text
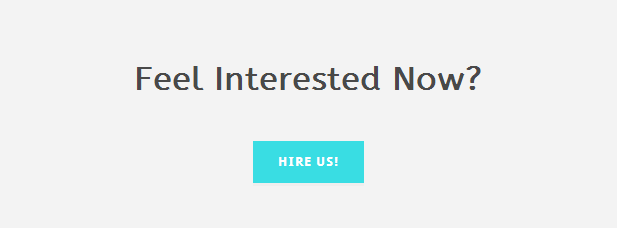
Skill Bar
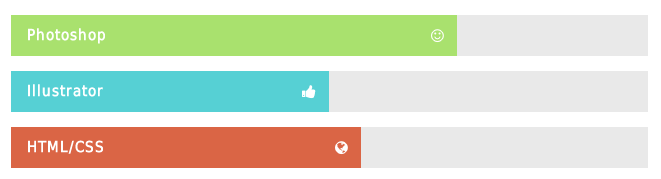
Skill Item
Styled Box
Title
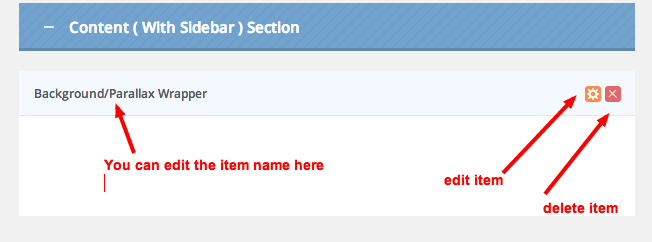
Once you add the item, you can click the gear sign to edit the item parameter.
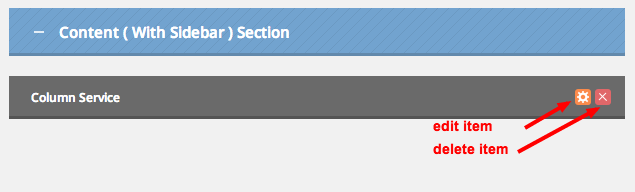
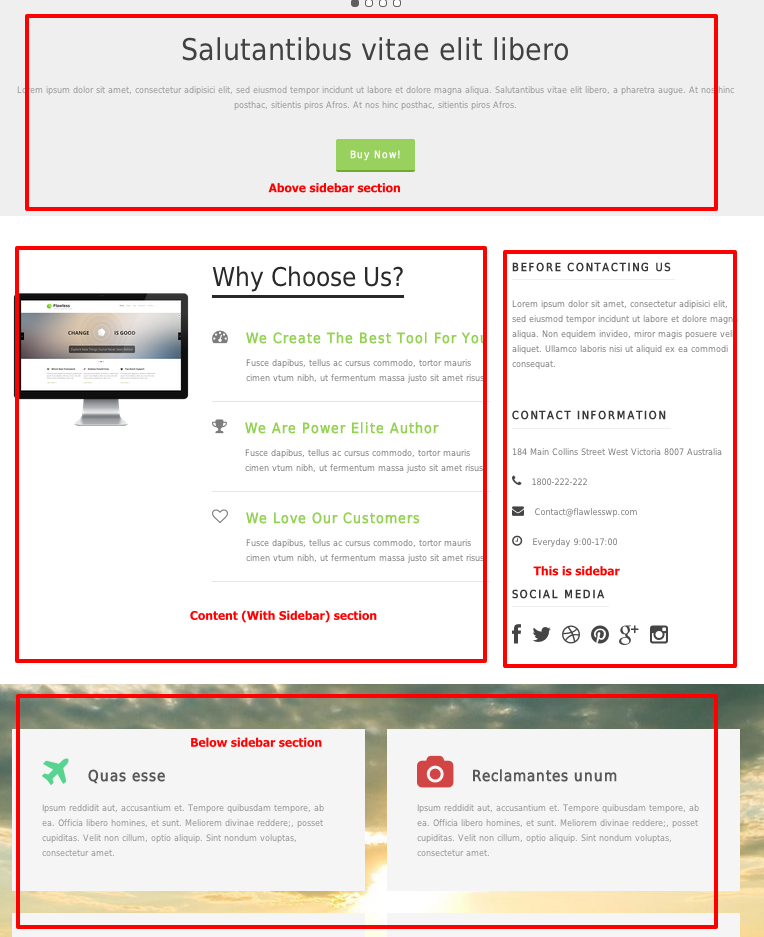
Page Item Area
We have 3 sections for page item area.- Above Sidebar Section
- Content (With Sidebar) Section
- Below Sidebar Section
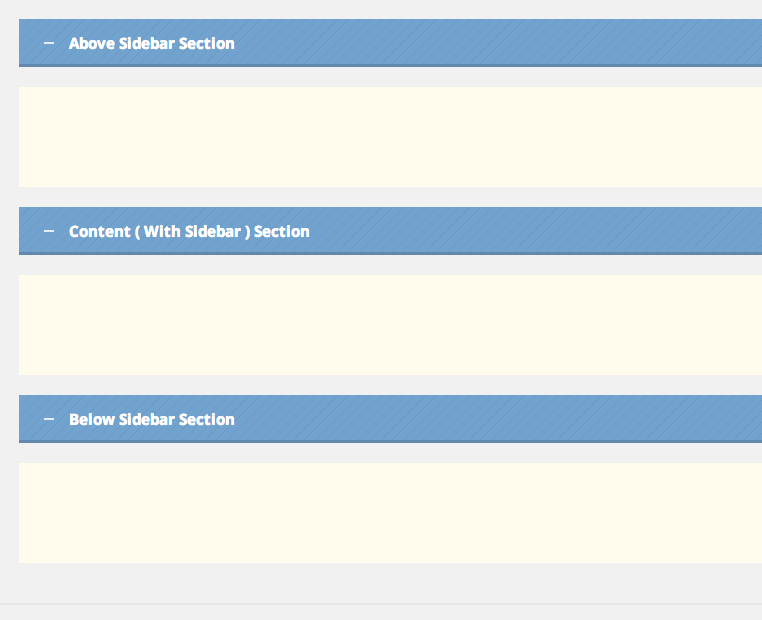
See how it works here...
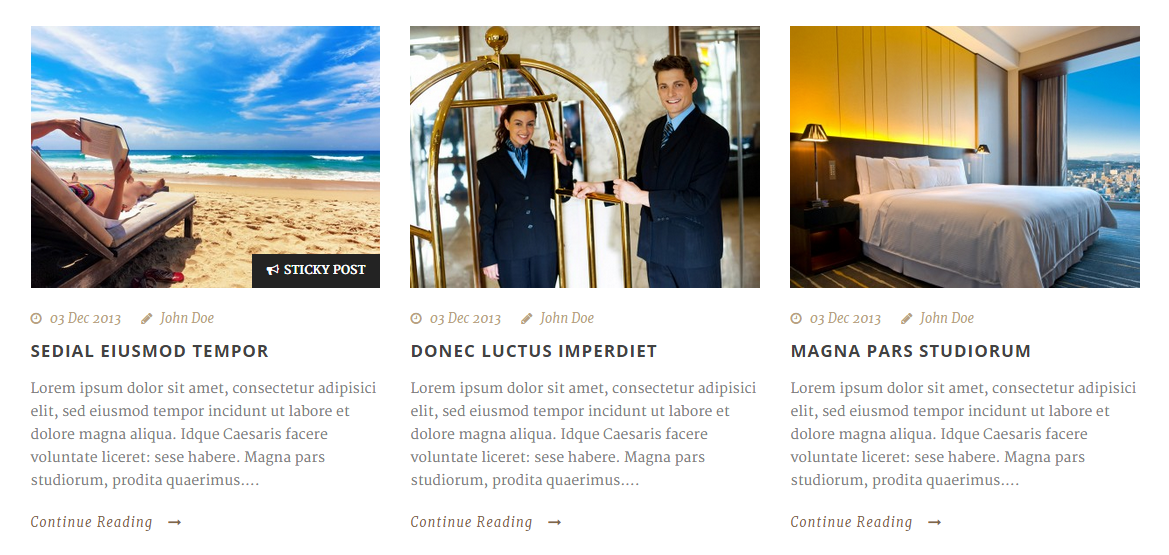
Creating Blog
1.) Go to 'Post > Add New' and fill the info you want.
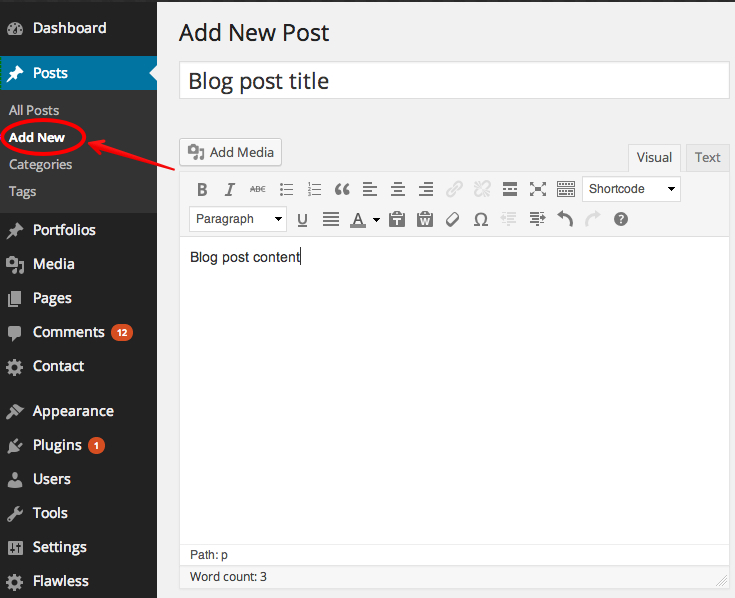
2.) You can set the post sidebar at the 'Goodlayers Post Option' area.
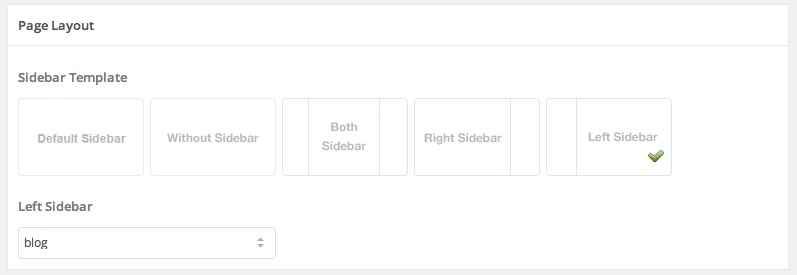
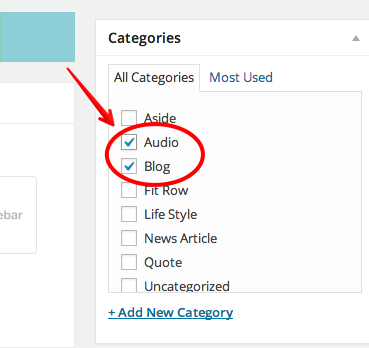
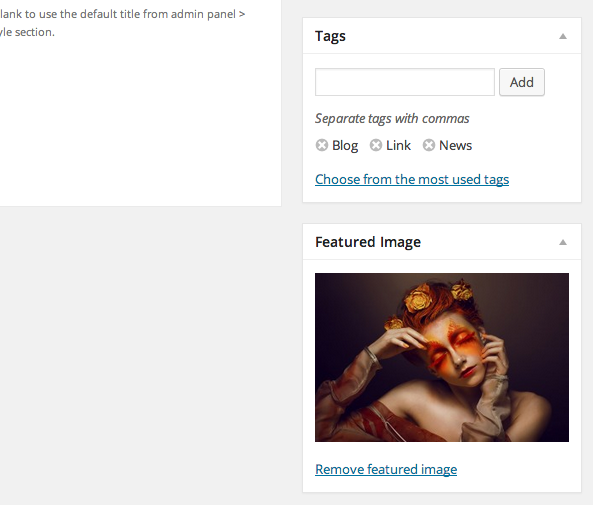
3.) Assign category(s).
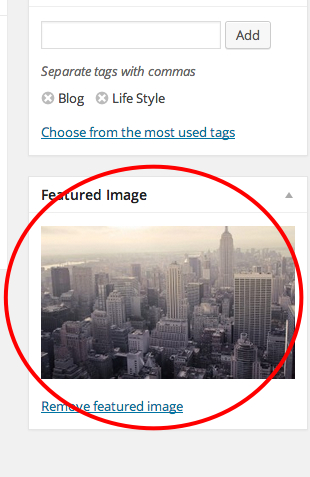
4.) Select featured image for thumbnail.(You may skip this if you use post format,... see below for detail) and publish the post
5.) Create a new page and add page item 'blog'.
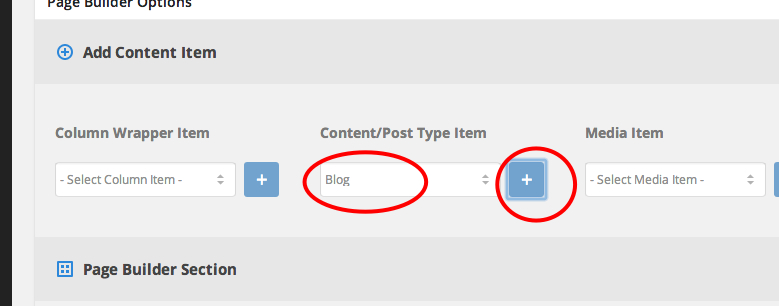
6.) Click on gear icon on page item to set options.
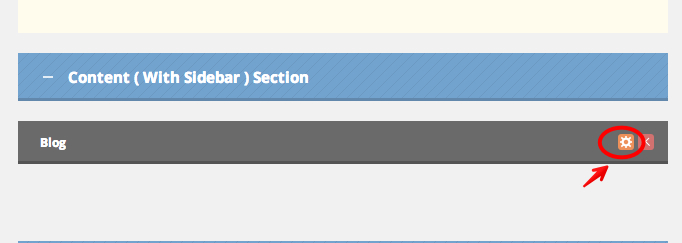
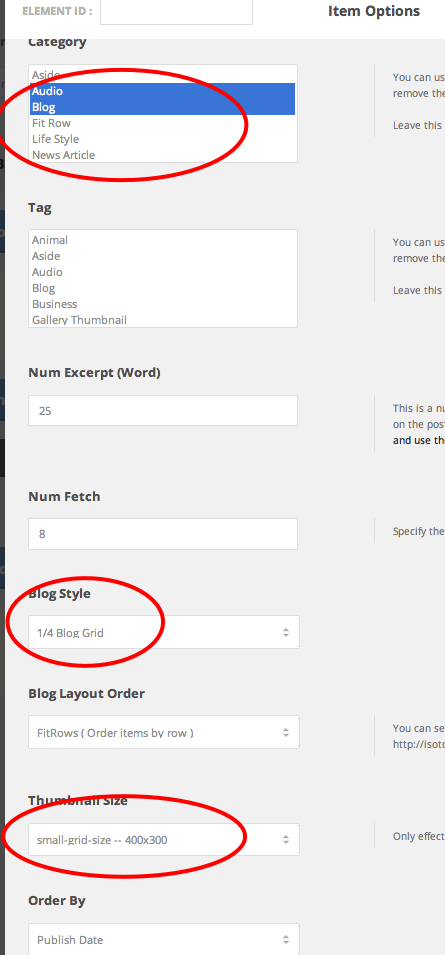
7.) Select category(s), blog layout, thumbnail size and many other options here.
8.) Publish the page.
Default Sidebar And Thumbnail Size
The default post sidebar(also applied to old posts before activating theme) and the thumbnail size of individual post page can be set at the 'Theme option > General > Blog Style'
Post Format
Normally, when you add images, video, audio in to the content of each post, it'll show among the content area. Post format give you an ability to style them in different ways. You can see all post format style at the top of this link on our demo site.Here's the list of how each post format will react when you place different content.
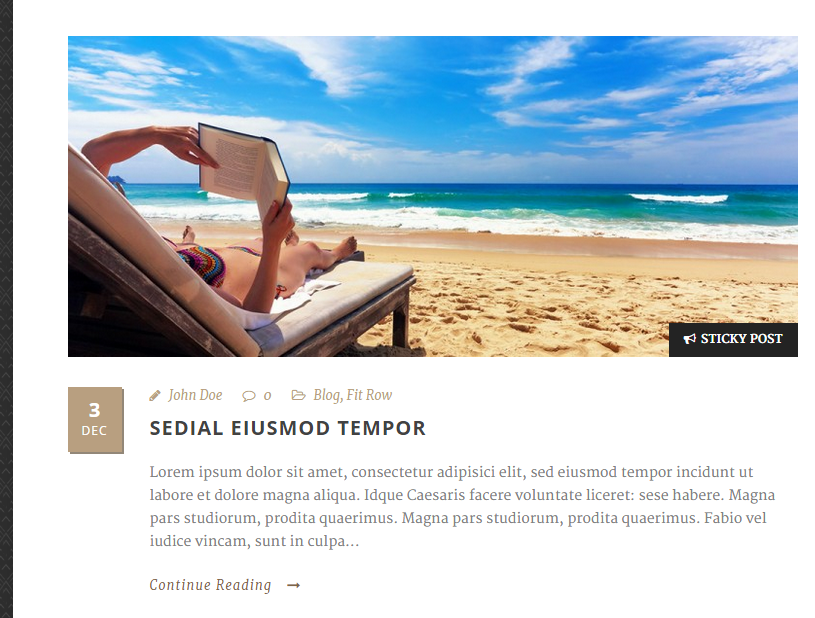
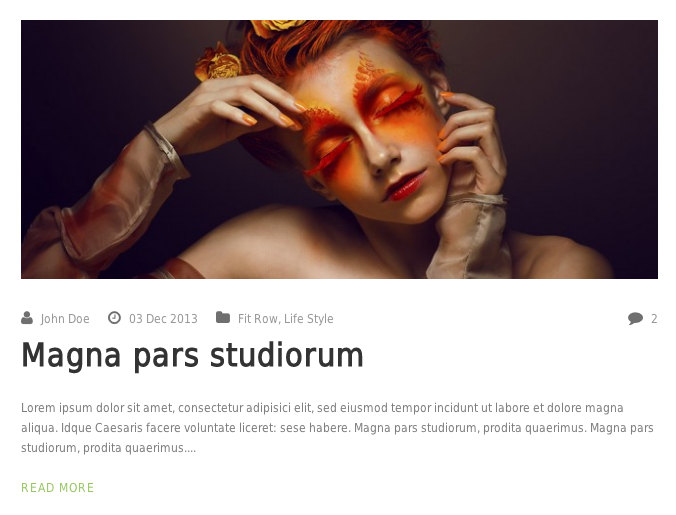
- Standard : Feature image will be shown above post title | screenshot1 | screenshot2
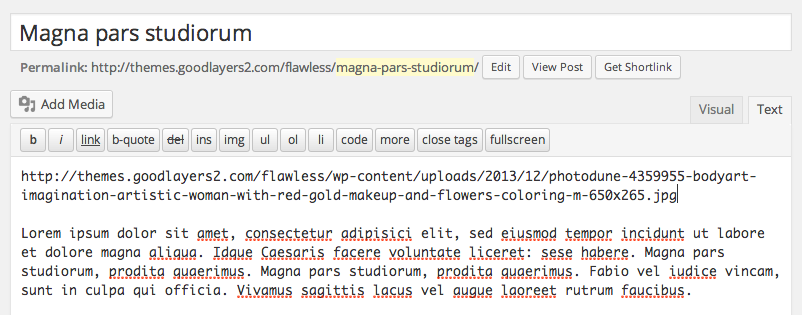
- Image : Place the url of the image at the top of the post and it'll show up above the post title screenshot1 | screenshot2
- Gallery : Place the gallery shortcode at the top of the content and it'll show a slideshow above post title | screenshot1 | screenshot2
- Aside : All content in aside post format will shows like this | screenshot1
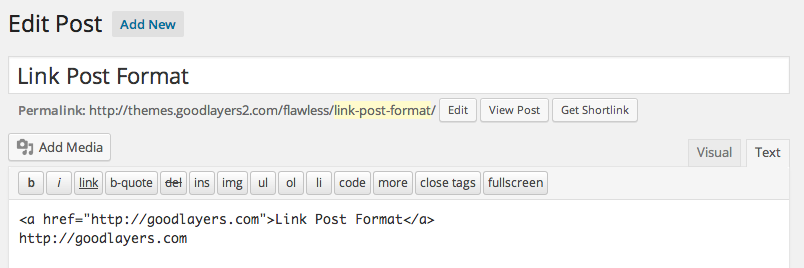
- Link : Place link url at the top of the content and it'll link the title of the post to the link you want | screenshot1 | screenshot2
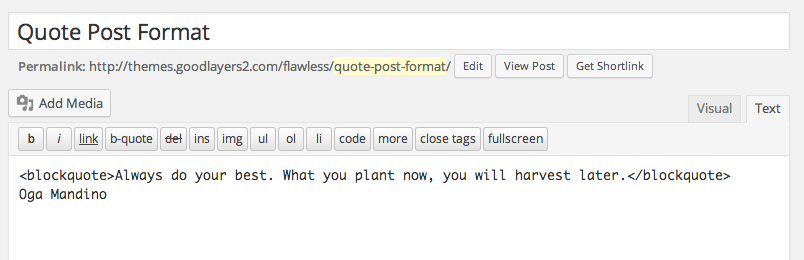
- Quote : Place quote html at the top and the rest content will shows as quote author | screenshot1 | screenshot2
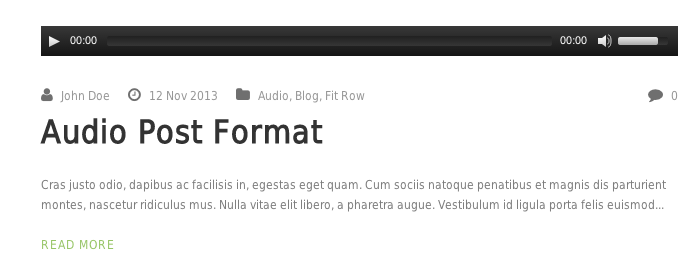
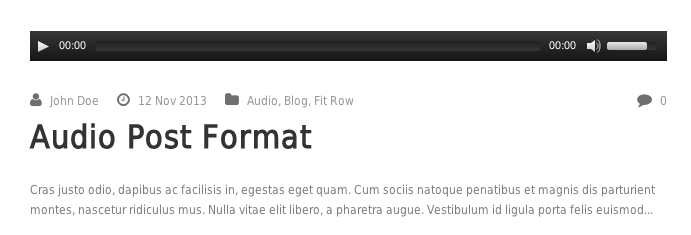
- Audio : Place audio url or shortcode at the top and it'll showing up above post title | screenshot1 | screenshot2
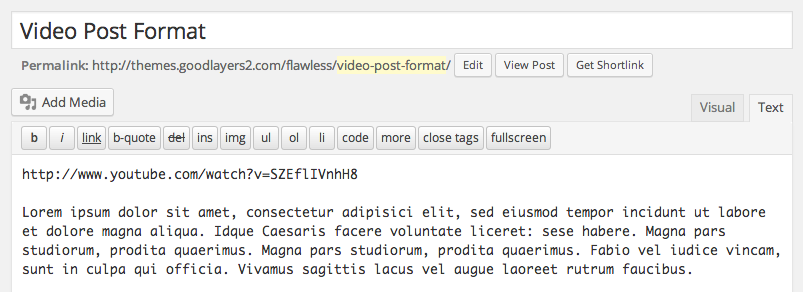
- Video : Place video url or shortcode at the top and it'll showing up above post title | screenshot1 | screenshot2
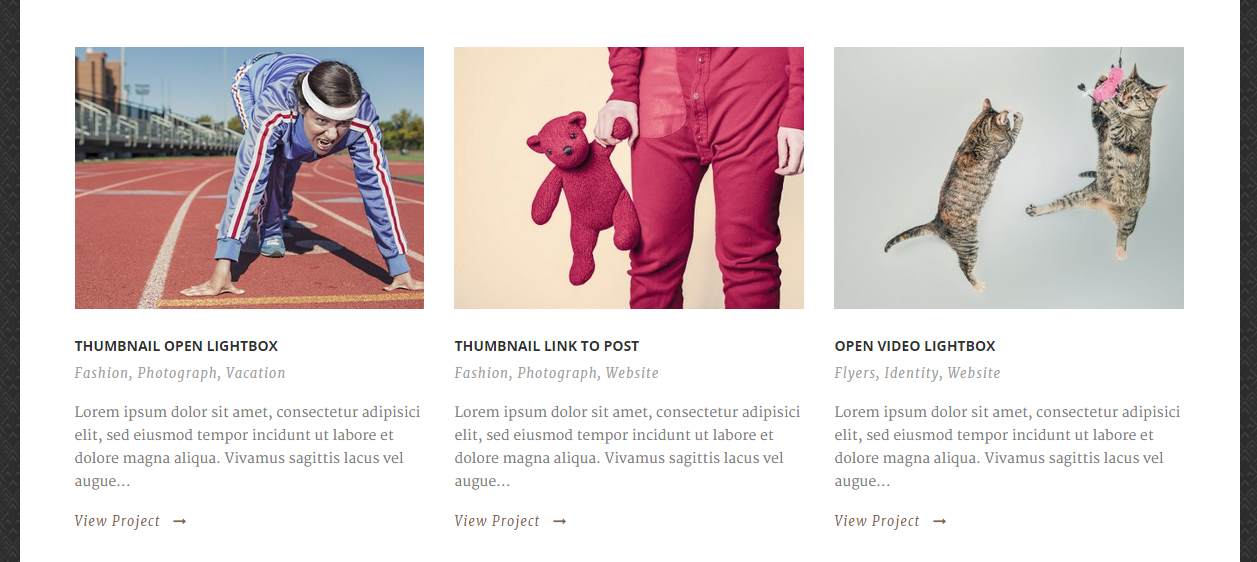
Creating Portfolio
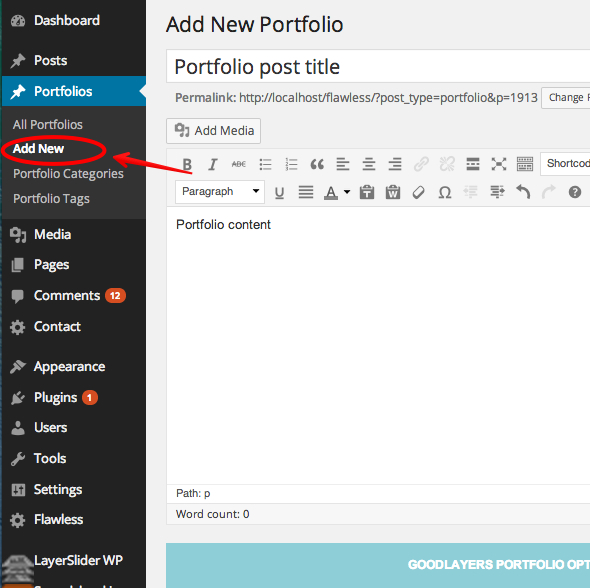
1.) Go to 'Portfolios > Add Portfolios' and fill the info you want.
2.) You can set the portfolio sidebar at the 'Goodlayers Post Option' area.
3.) Assign category(s).
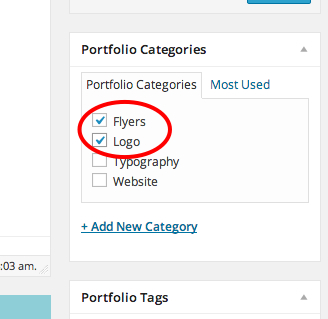
4.) Select featured image for thumbnail and publish the post.
5.) Create a new page and add page item 'Portfolio'.
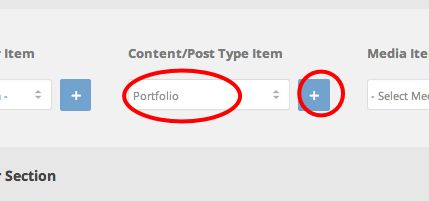
6.) Click on gear icon on page item to set options.
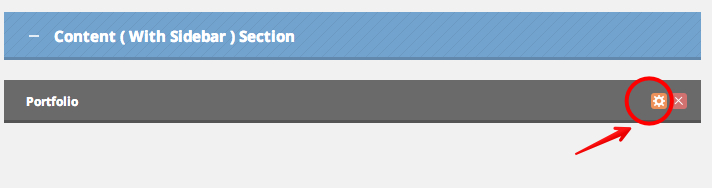
7.) Select category(s), portfolio layout, thumbnail size and many other options here.
Portfolio Title Link option will allow you to open portfolio in lightbox instead.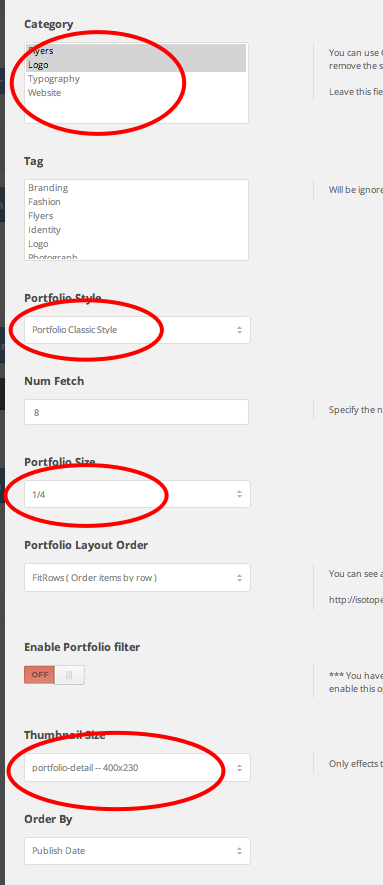
8.) Publish the page.
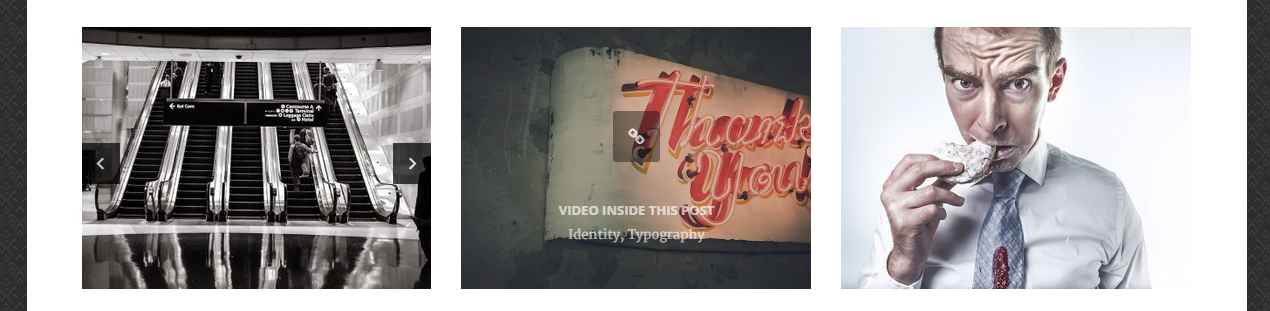
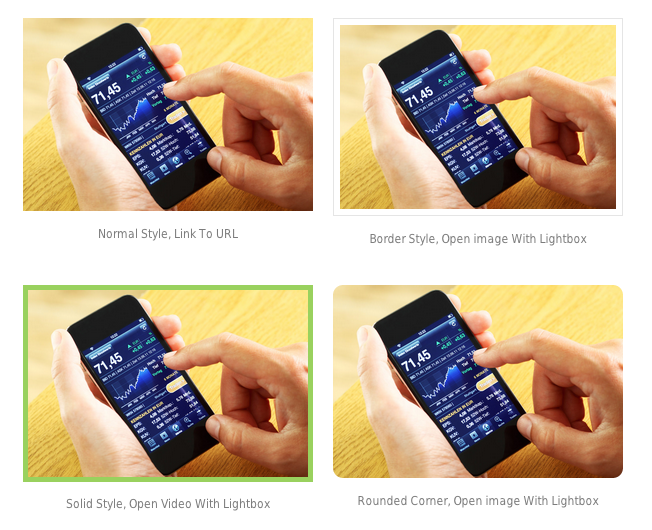
Portfolio Thumbnail Type
Thumbnail in portfolio list page
You can select type as 'Featured image', 'Video', 'Slider' and for 'Featured image', you'll be able to open lightbox with image, video or you can also let it link to specific url as well.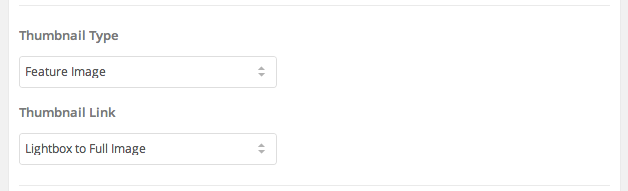
Thumbnail in portfolio single post
You can select type as 'Image', 'Video', 'Slider' and 'Stack images'.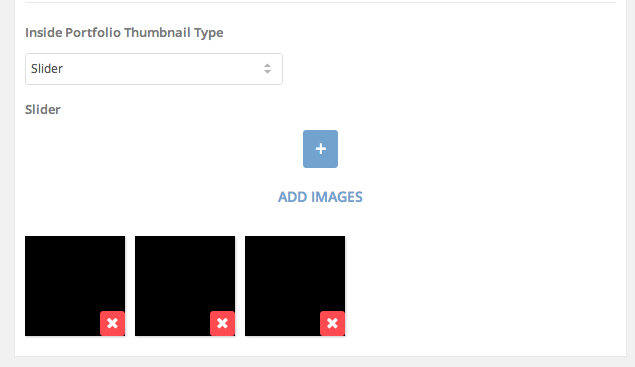
You can learn more about thumbnail management in 'FAQ > Video Tutorial > Thumbnail Management'.
Portfolio Single Post Layout
There're 3 individual portfolio style which can be changed in the 'Theme option > General > Portfolio' section. ( Also the thumbnail size can be changed at the same place as well. )
Creating Hotel Room / Apartment
1.) Go to 'Room(Hotel, Apartment) > Add New' and fill the info you want.
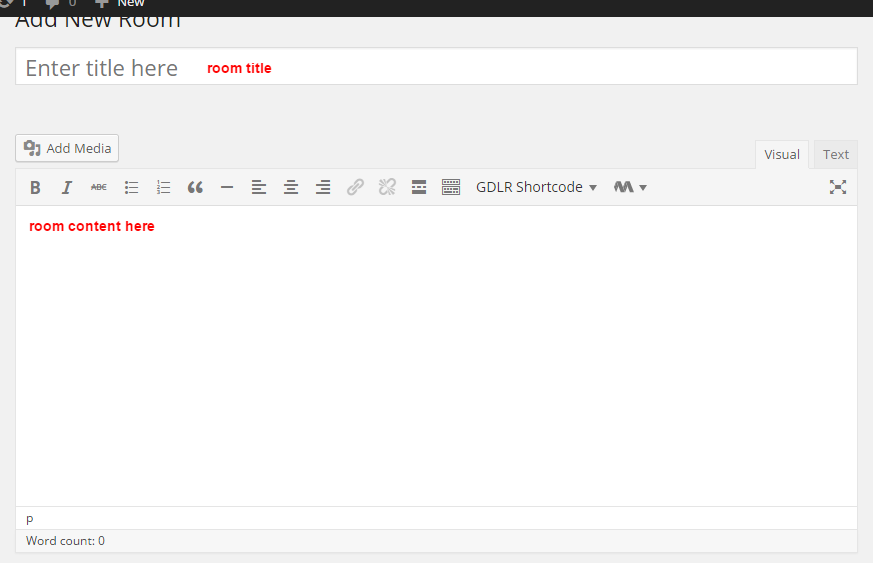
You can use this snippet in room content area to create layout like in the demo site (Classic & Apartment demo).
Room Details
Donec sed odio dui. Donec sed odio dui. Aenean eu leo quam. Pellentesque ornare sem lacinia quam venenatis vestibulum. Curabitur blandit tempus porttitor. Integer posuere erat a ante venenatis dapibus posuere velit aliquet. Etiam porta sem malesuada magna mollis euismod. Cras justo odio, dapibus ac facilisis in, egestas eget quam. Etiam porta sem malesuada magna mollis euismod. Maecenas sed diam eget risus varius blandit sit amet non magna.Praesent commodo cursus magna, vel scelerisque nisl consectetur et.

[gdlr_space height="40px"]
[gdlr_divider type="thick"]
[gdlr_space height="-20px"]

[gdlr_row]
[gdlr_column size="1/3"]The Space[/gdlr_column]
[gdlr_column size="1/3"]Accommodates : 4

Bathrooms : 1

Bedroom : 1

Beds : 1
[/gdlr_column]
[gdlr_column size="1/3"]Check In : 02:00 PM

Check Out : 12:00 PM

Property Type : Apartment / Room
[/gdlr_column]
[/gdlr_row]

[gdlr_space height="10px"]
[gdlr_divider type="thick"]
[gdlr_space height="-20px"]

[gdlr_row]
[gdlr_column size="1/3"]Amenities[/gdlr_column]
[gdlr_column size="1/3"]Wifi : Free

Elevator : No

Hair Dryer : Yes

Air Conditioning : Yes
[/gdlr_column]
[gdlr_column size="1/3"]Parking : $20 / Car / Night

Safety Box : Yes

Television : Yes
[/gdlr_column]
[/gdlr_row]

[gdlr_space height="10px"]
[gdlr_divider type="thick"]
[gdlr_space height="-20px"]

[gdlr_row]
[gdlr_column size="1/3"]Prices[/gdlr_column]
[gdlr_column size="1/3"]Extra people : From $50 / night
after 2 guests

Cleaning Fee : $17

[/gdlr_column]
[gdlr_column size="1/3"]Security Deposit : $50

Weekly Discount : 10%
[/gdlr_column]
[/gdlr_row]

[gdlr_space height="10px"]
[gdlr_divider type="thick"]
[gdlr_space height="-20px"]

Photos

[gallery columns="4" link="file" caption="no" thumbnail_size="small-grid-size" ids="3511,3512,3510,3519,3518,3533,3531,3532"]

[gdlr_space height="10px"]
[gdlr_divider type="thick"]
[gdlr_space height="-10px"]

Description

Aenean eu leo quam. Pellentesque ornare sem lacinia quam venenatis vestibulum. Vivamus sagittis lacus vel augue laoreet rutrum faucibus dolor auctor. Vivamus sagittis lacus vel augue laoreet rutrum faucibus dolor auctor. Cum sociis natoque penatibus et magnis dis parturient montes, nascetur ridiculus mus. Cras justo odio, dapibus ac facilisis in, egestas eget quam. Sed posuere consectetur est at lobortis. Etiam porta sem malesuada magna mollis euismod.

Cras justo odio, dapibus ac facilisis in, egestas eget quam. Sed posuere consectetur est at lobortis. Praesent commodo cursus magna, vel scelerisque nisl consectetur et. Curabitur blandit tempus porttitor. Cum sociis natoque penatibus et magnis dis parturient montes, nascetur ridiculus mus. Cum sociis natoque penatibus et magnis dis parturient montes, nascetur ridiculus mus. Cras justo odio, dapibus ac facilisis in, egestas eget quam.

[gdlr_space height="40px"]
[gdlr_divider type="thick"]
[gdlr_space height="-20px"]

Location

Address : 246 Vauxhall Bridge Rd, Westminster, London SW1V 1AU, UK
Phone : +44 20 8764 9834
[email protected]

[put_wpgm id=1]
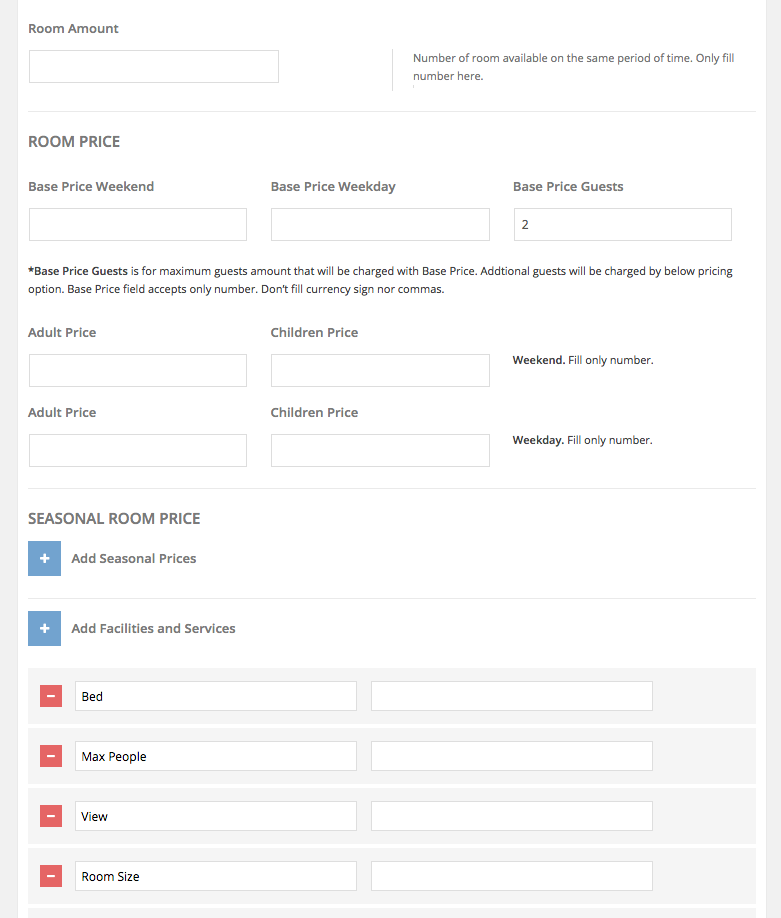
2.) Fill room prices and all info.
3.) Assign category(s).
4.) Select featured image for thumbnail and publish the post.
5.) Create a new page and add page item 'Hotel Room'.
6.) Click on gear icon on page item to set options.

7.) Select category(s), layout, thumbnail size and many other options here.
8.) Publish the page.
Creating Hostel Room
1.) Go to 'Room(Hostel) > Add Rooms' and fill the info you want.
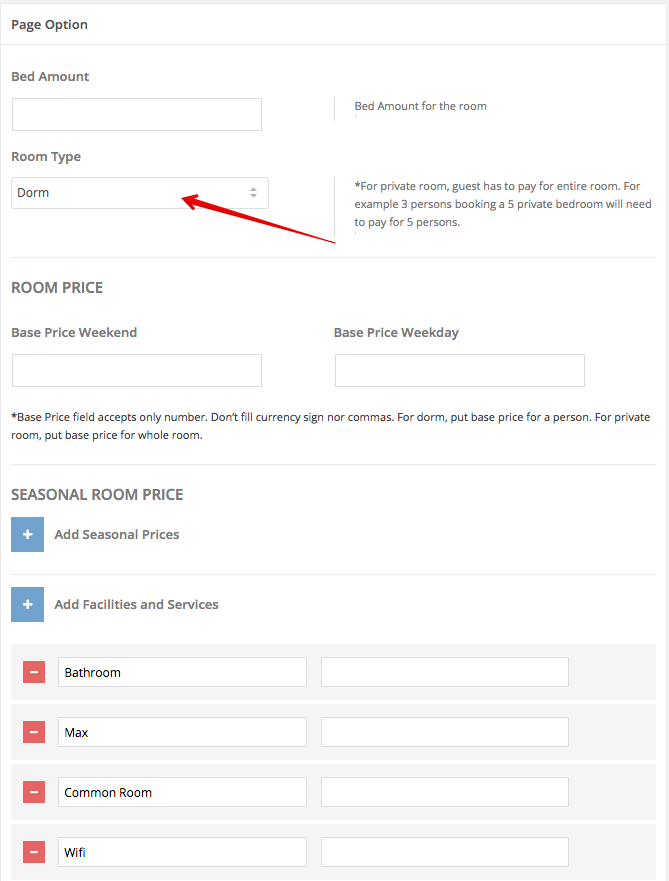
2.) Select room type, fill room prices and all info.
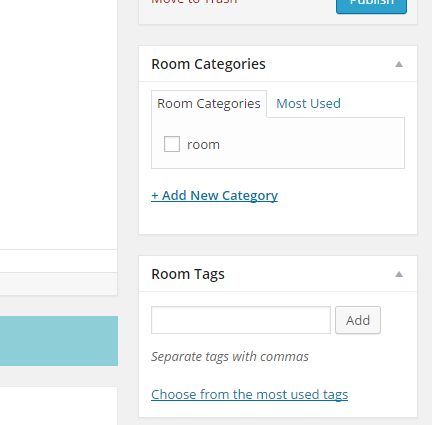
3.) Assign category(s).
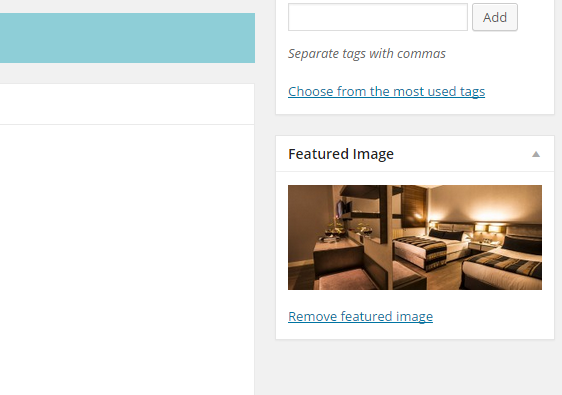
4.) Select featured image for thumbnail and publish the post.
5.) Create a new page and add page item 'Hostel Room'.
6.) Click on gear icon on page item to set options.
7.) Select category(s), layout, thumbnail size and many other options here.
8.) Publish the page.
Setting Up Multiple Branches
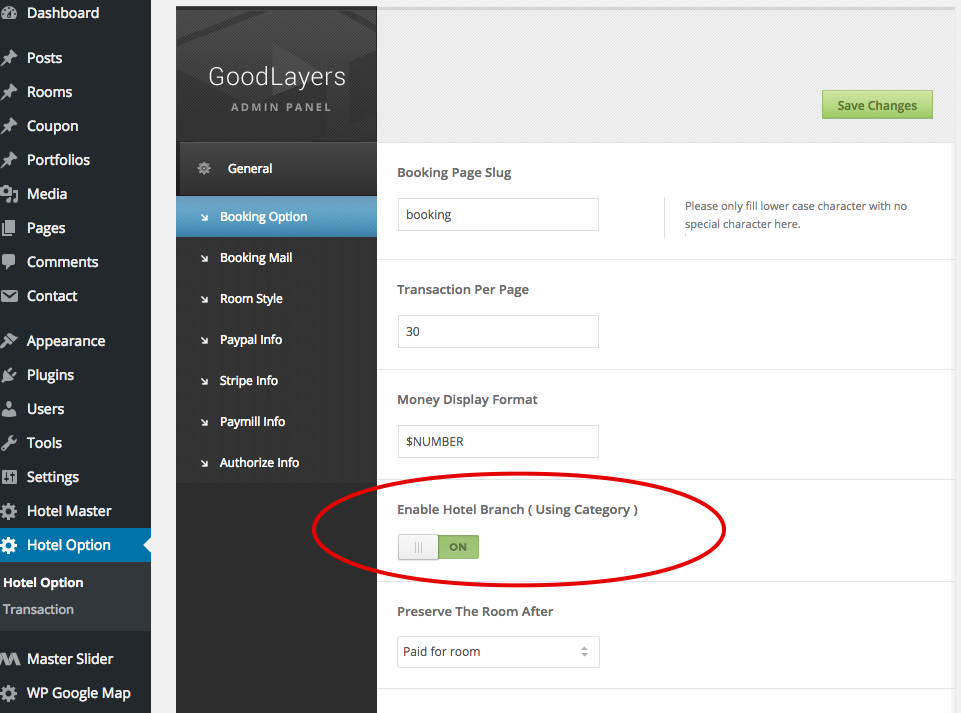
1.) Enable Hotel Branches option by going to "hotel option > general > booking option > enable hotel branches".
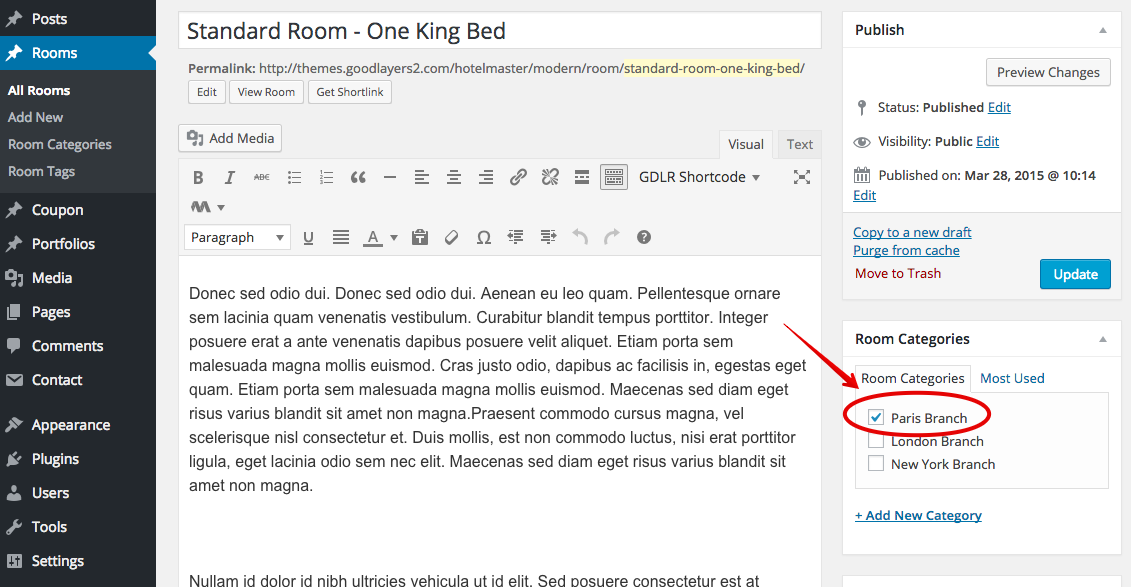
2.) Rooms category will be used as hotel branch.
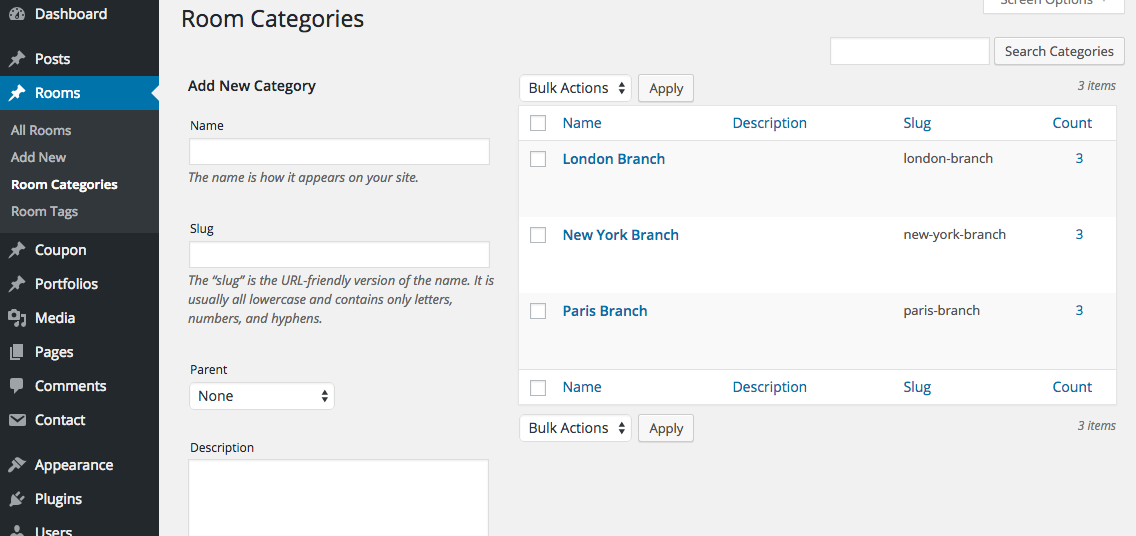
3.) You can fill hotel branch's location here, The location will be used in email that sent to customers.
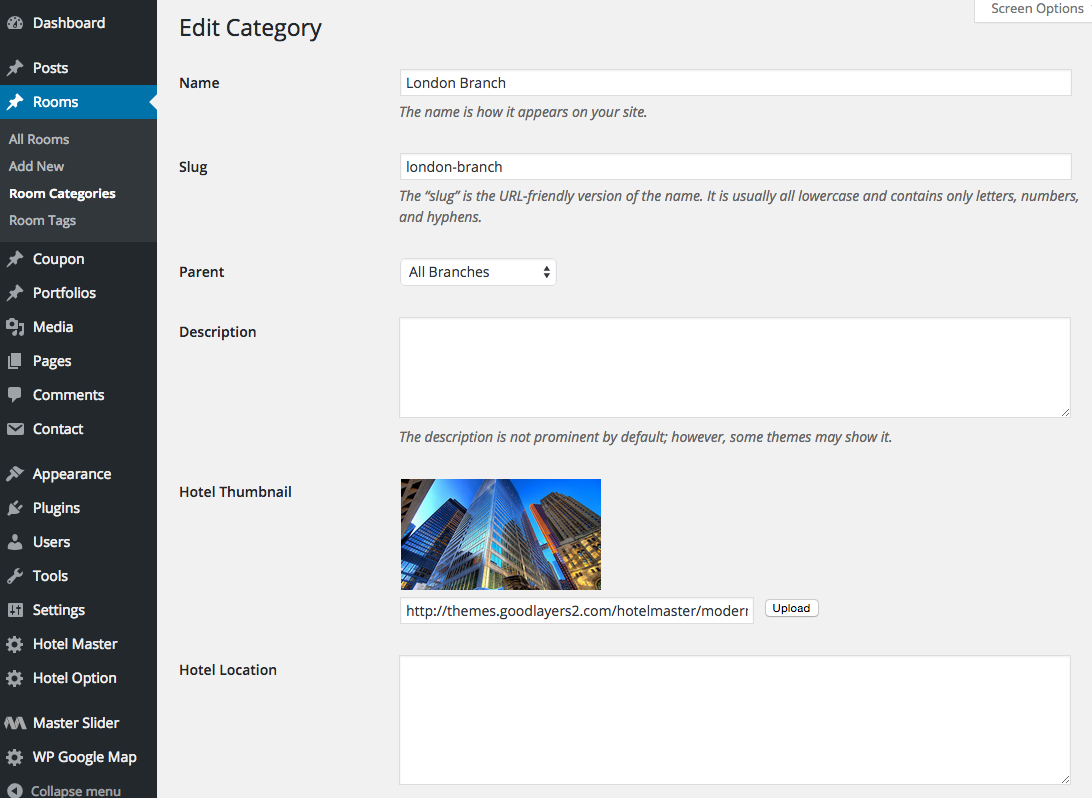
4.) Assign rooms' categories to the branch.
Next part will show how to create hotel branch page.
6.) Create page category.
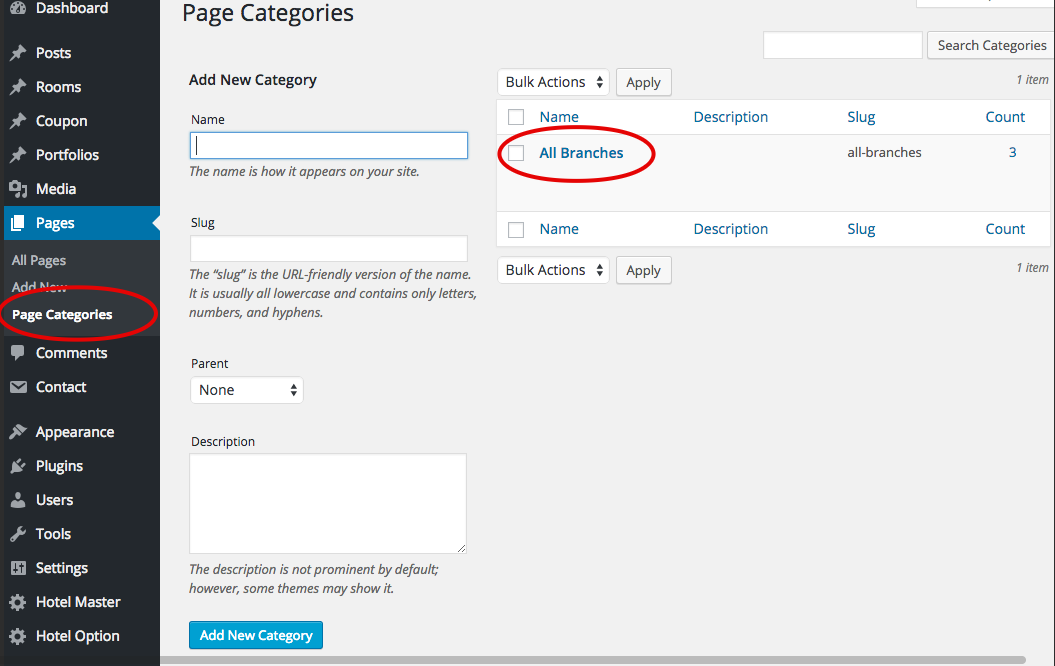
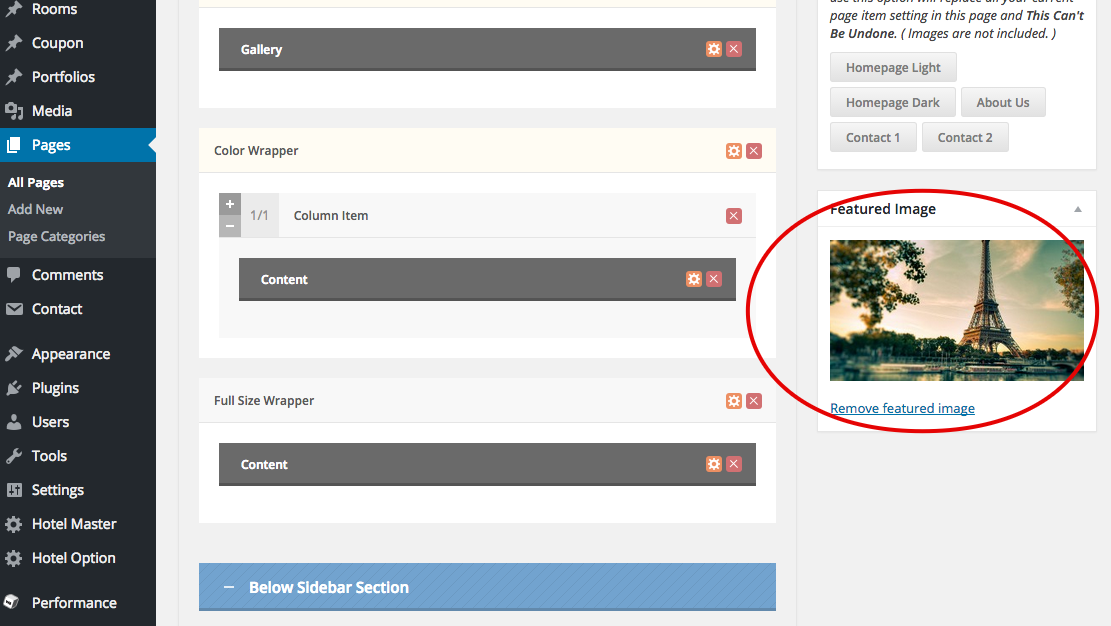
7.) Create a new page. This page will be considered as hotel branch page. Then assign page's category to one we just created and also assign featured image to it as well..
( http://demo.goodlayers.com/hotelmaster/modern/paris-branch/ , To set up page like this, you can easily click on the "Load Demo Page" on the right side )
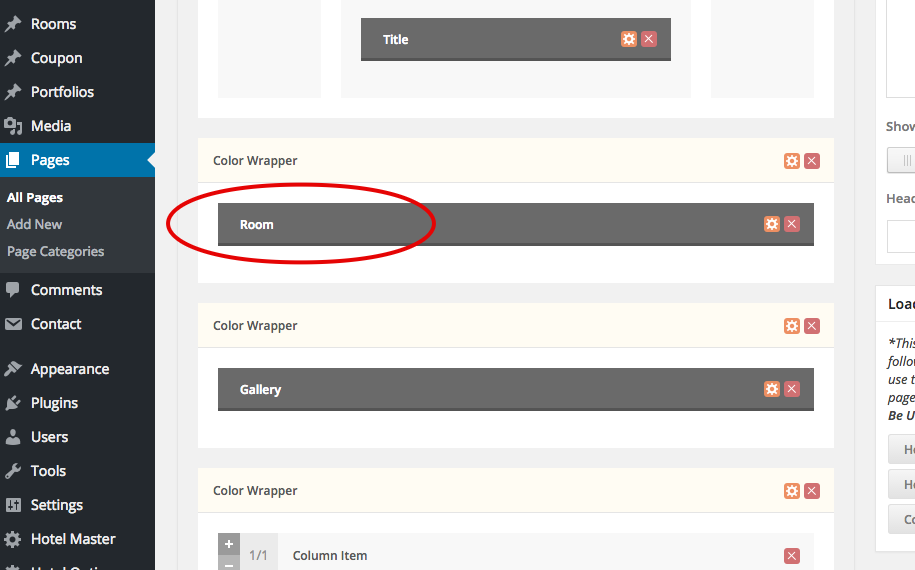
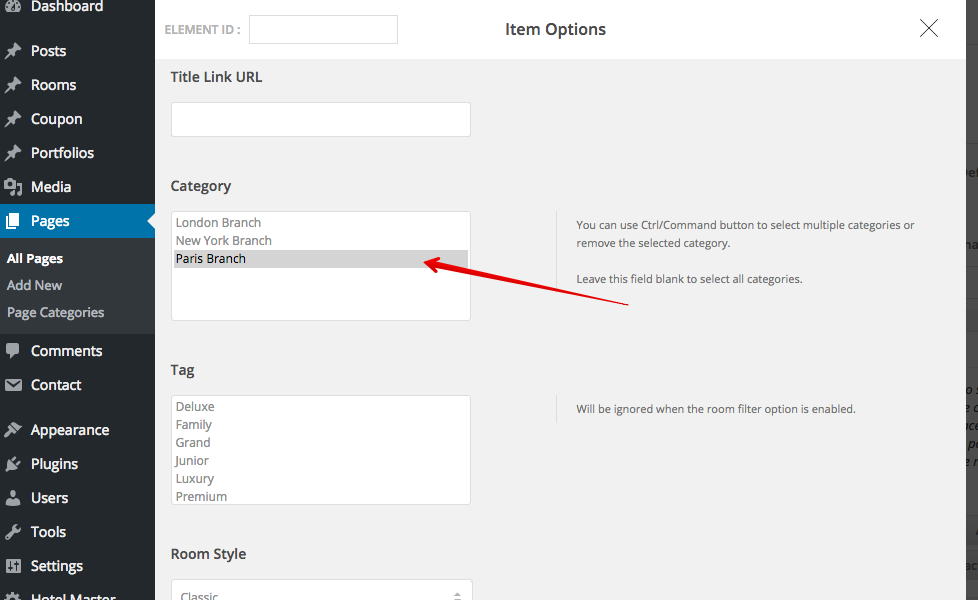
8.) Use page item "Room" to show room list and in page item setting, choose the relevant category to the branch.
Next part is how to list all branch.
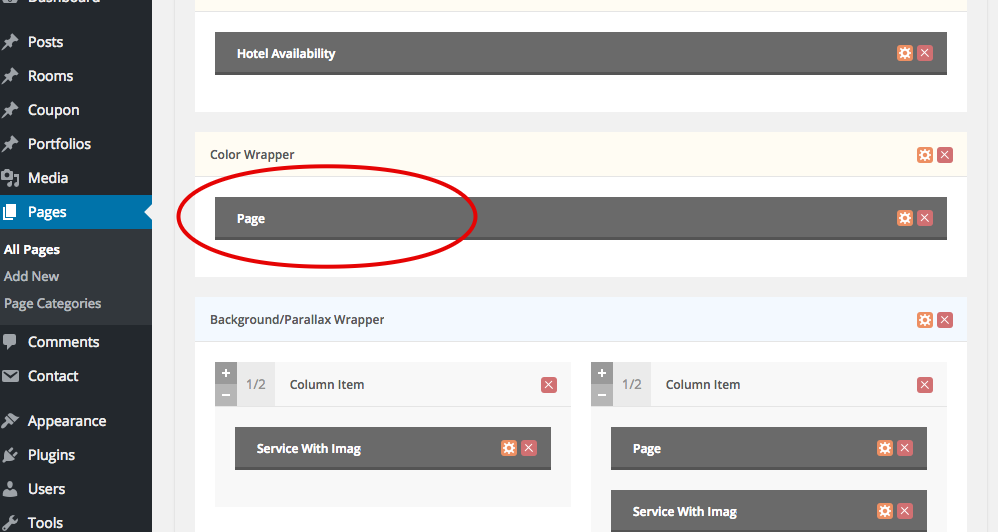
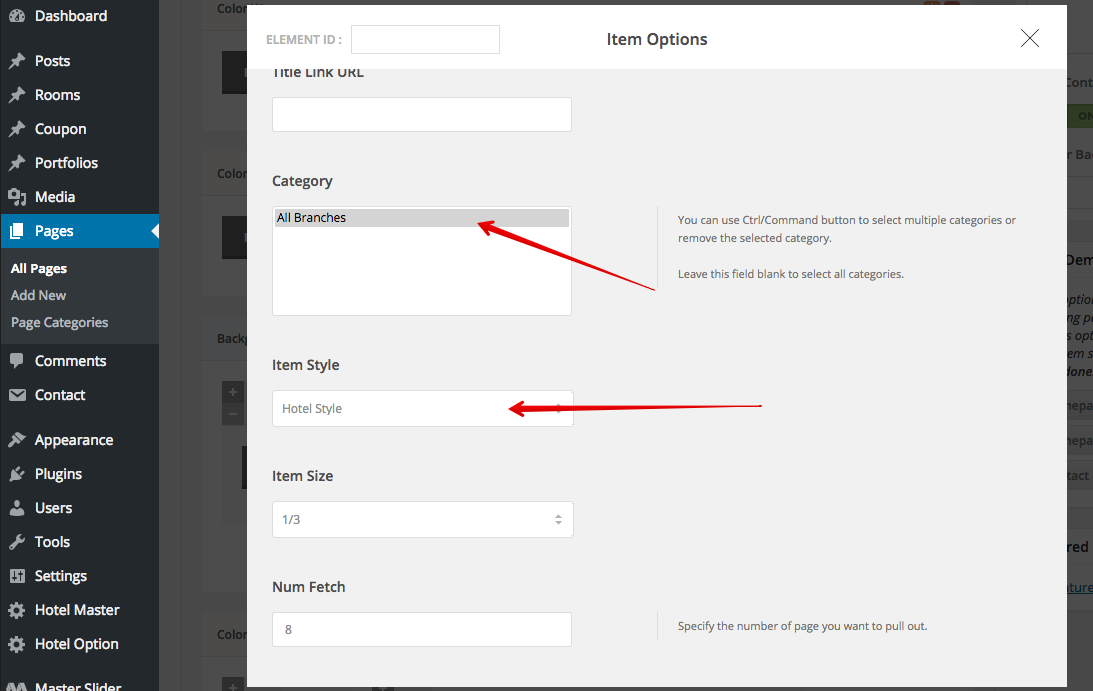
9.) In homepage(or any pages), you can show branch list by using page item "Page". In page item setting, select page category that we just created in 6.) and select item style as "Hotel Style"
iCal
You can use iCal feature to sync the booking with third party service such as Air BnB, VRBO other any other services that support iCal feature.***Please note that this method only available when you have only one room in 'Room amount' setting. If you have more than one room, this feature is not available.
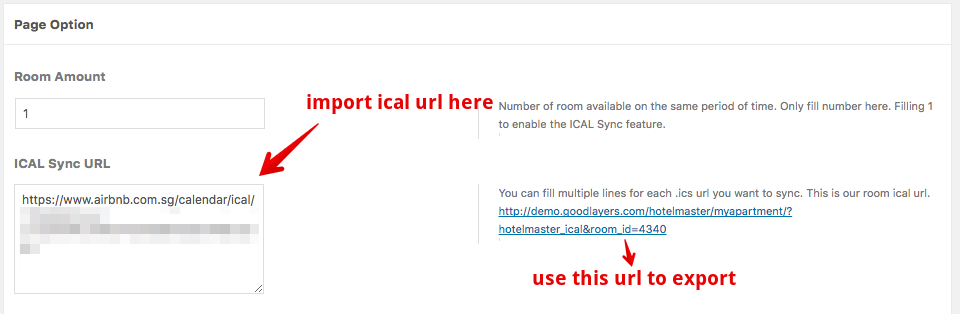
You can import multiple iCal by enter to the new line and fill new iCal url.
Setting Syncing Time Period
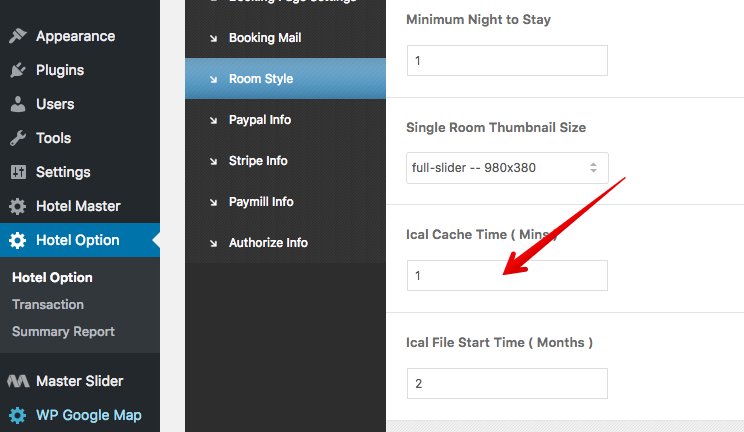
You can set the refresh interval for iCal as specific minutes in Hotel Option > General > Room Style > iCal Cache Time(Mins)However, please note that we can only refresh the imported iCal(i.e. from Air BnB) but note that on Air BnB and VRBO side, they will refresh their imported iCal(i.e. Hotel Master's iCal or other services) about every one hour so there will be a period of time that might occur the duplicate booking. This is nothing we can do about it too.(This problem is not our problem, it's about how they set the refresh interval.)
Setting Old Data Period in iCal file
You can set the specific months to allow iCal to keep old data. For example, if you set it as '2', all iCal data that's older than two months will be removed. This feature is used for minimizing the iCal file size.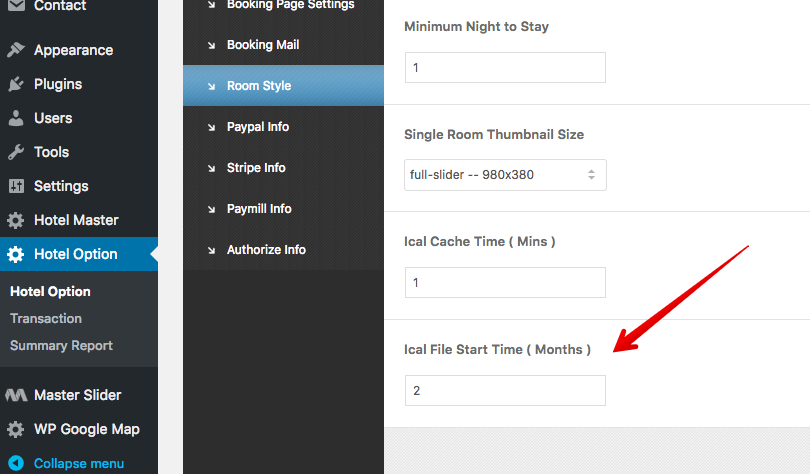
Syncing iCal with Air BnB
https://www.airbnb.com/help/article/99/how-do-i-sync-my-airbnb-calendar-with-another-calendarSyncing iCal with VRBO
https://help.vrbo.com/articles/How-do-I-import-my-iCal-or-Google-calendarSyncing iCal with HomeAway
https://help.homeaway.com/articles/How-do-I-import-my-iCal-or-Google-calendarSyncing iCal With iCloud Calendar(Apple)
You can use the benefit of iCal to view your booking in calendar view and also be able to perform the manual booking or manual blocking the room.1. Open single room edit page and copy iCal url of your website.

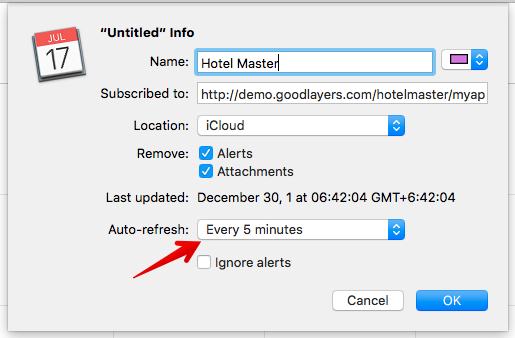
2. Open Calendar app from your Mac, on the top menu, clic on 'File > New Calendar Subscription...' and enter the url from 1.) then you can set the 'Auto-refresh' time as you want.
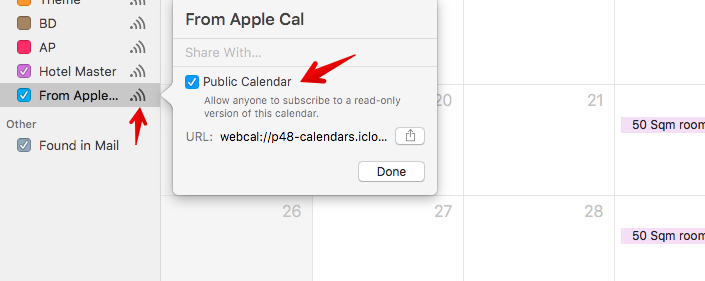
3. Create a new calendar and make it public.
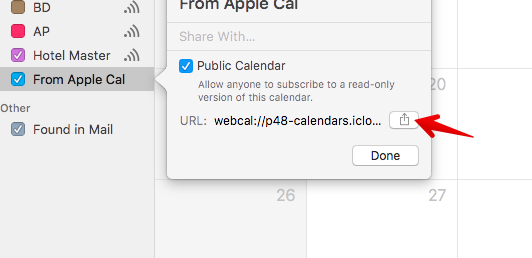
4. Click to share the calendar and select 'Message'. At this point, you will get the full url. Change the 'Webcal://' at the front of url to 'http://' and put the whole url in single room edit page in iCal Sync URL box.

Syncing iCal Using Cron Job
iCal syncing via front end can slow down your page loading so we have another option for syncing by using Cron Job. However, please note that this method requires server configuration knowledge skill. If you don't know, we suggest you to google for more or advise your host provider.The file that need to be called is 'wp-content/plugins/gdlr-hotel/hotel-cron.php'. When you use this method, make sure to set the iCal Cache Time in 'Hotel Option > Genearl > Room Style' to be the same as your cron job time interval.
Block Room On Specific Dates
You can block the room on specific dates in each room setting directly.Fill the date in yyyy-mm-dd format. Use * for recurring date, separated each date using comma, use the word 'to' for date range. Ex. *-12-25 to *-12-31 means special season is running every Christmas to New Year's Eve every year.

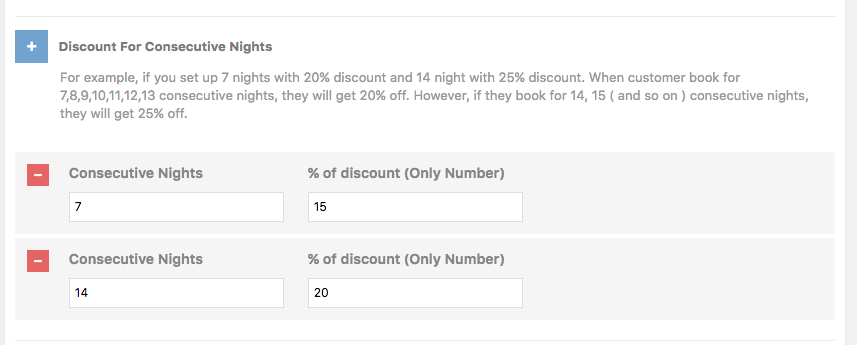
Pricing
You can set the pricing, add seasonal pricing and set up consecutive nights discount feature from room setting directly.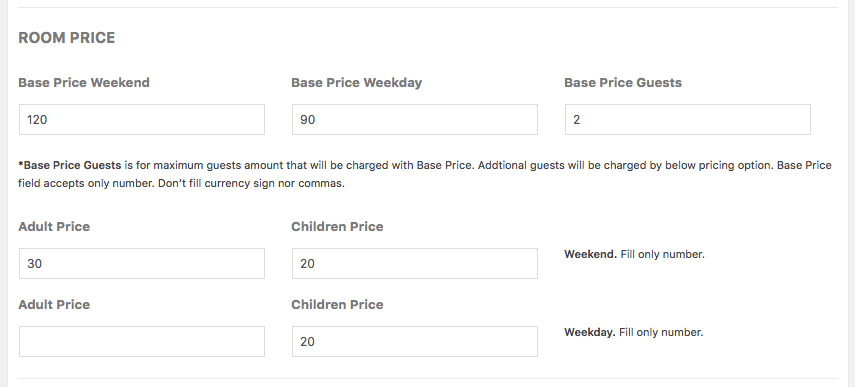
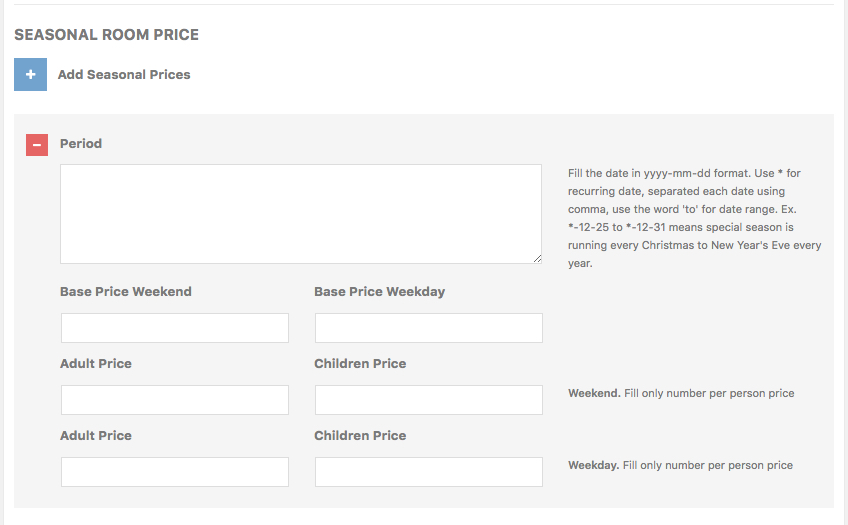
Pricing
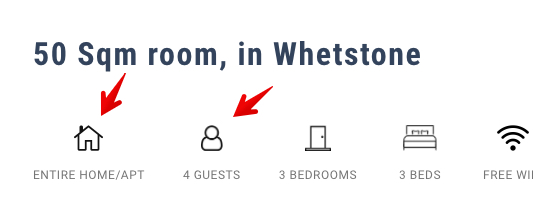
There are two styles of Facilities & Service which can be chosen in admin panel, Hotel Master > General > Hotel Style > Hotel Single Info Style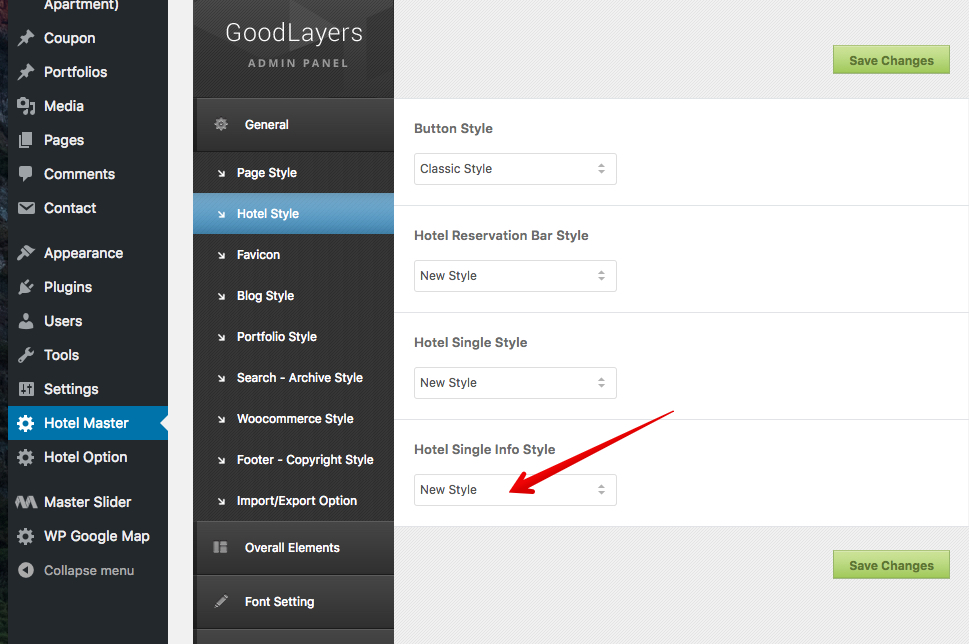
New Style
Please note that the New Style will only accept image. The title text won't be applied.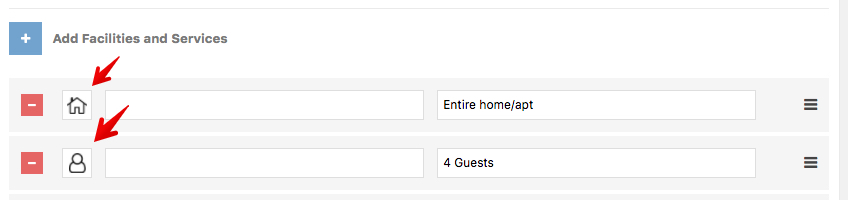
Classic Style
Please note that the Classic Style will only accept title text. The image won't be applied.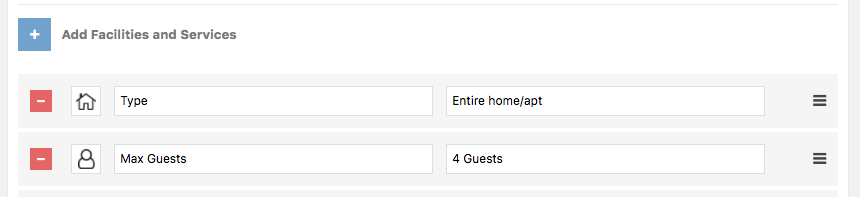

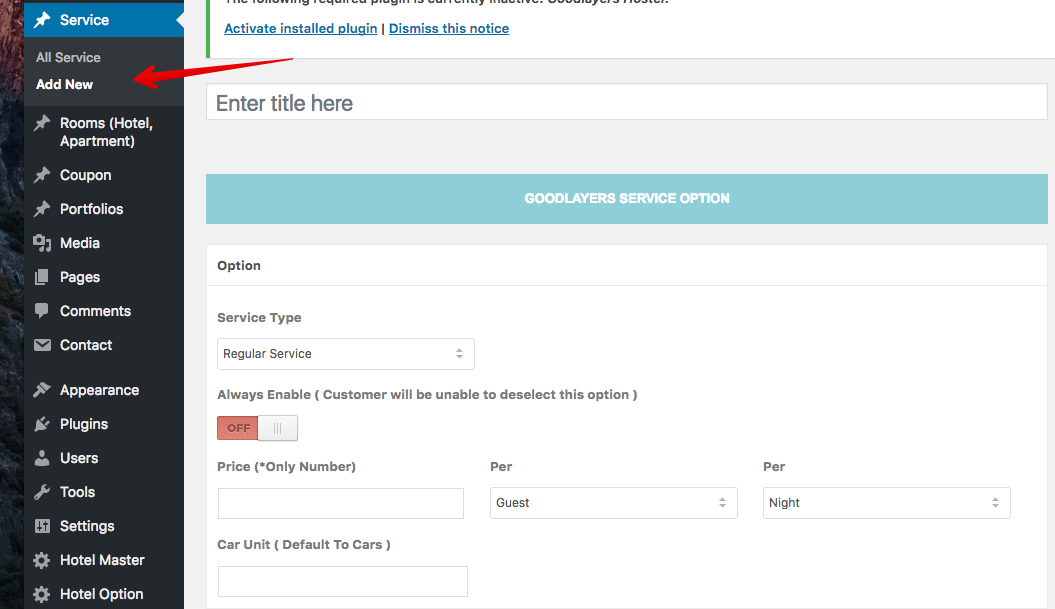
Additional Services
You can create addtional services and charge to your customer such as airport transfer, breakfast, carpark, cleaing fee.1. Got o Service > Add New
2. Fill information that you want.
3. You can also be able to set the service as mandatory by enable the 'Always Enable' button.
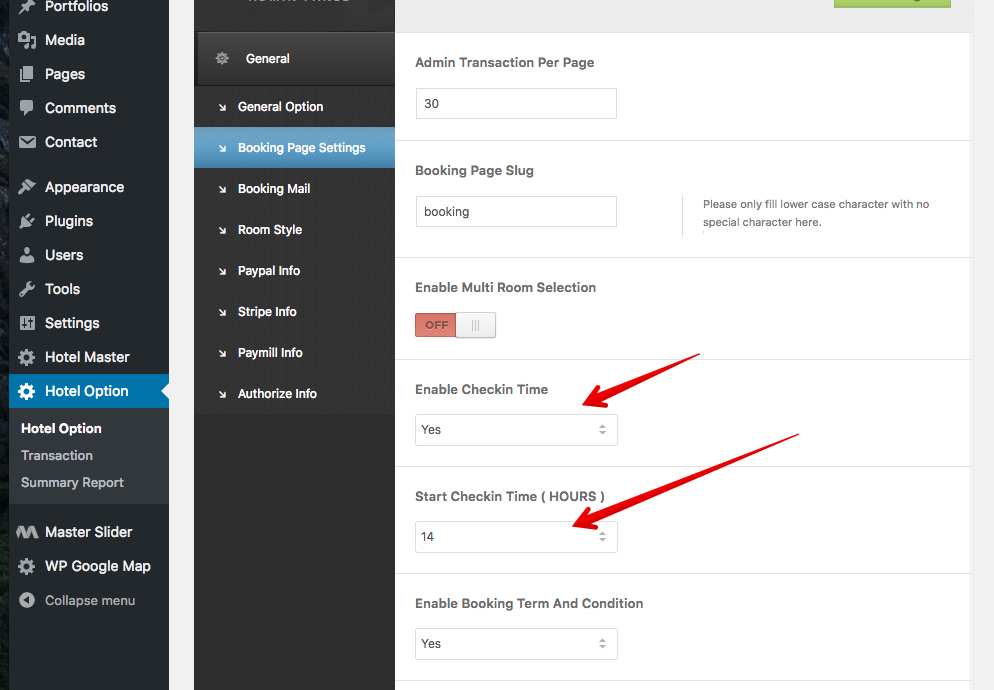
Check-in Time
You can set the check in time in Hotel Option > General > Booking Page Settings > Enable Check In Time1. Got o Service > Add New
2. Fill information that you want.
3. You can also be able to set the service as mandatory by enable the 'Always Enable' button.
Booking/Reservation Bar Style
There are two styles of the booking/reservation bar which can be selected in admin panel, Hotel Master > General > Hotel Style.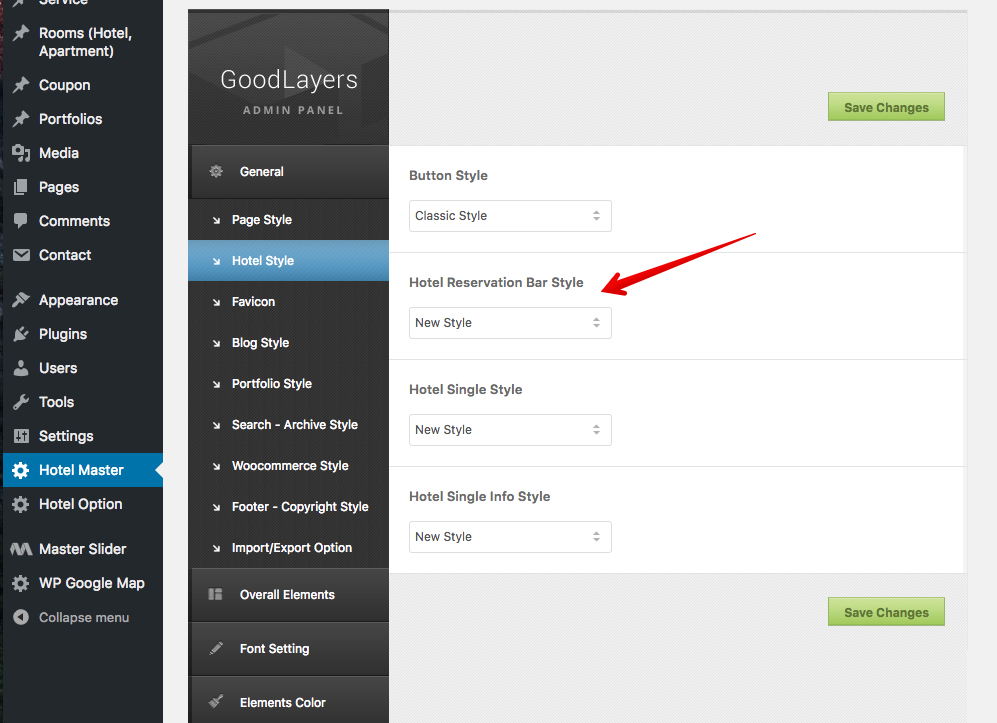
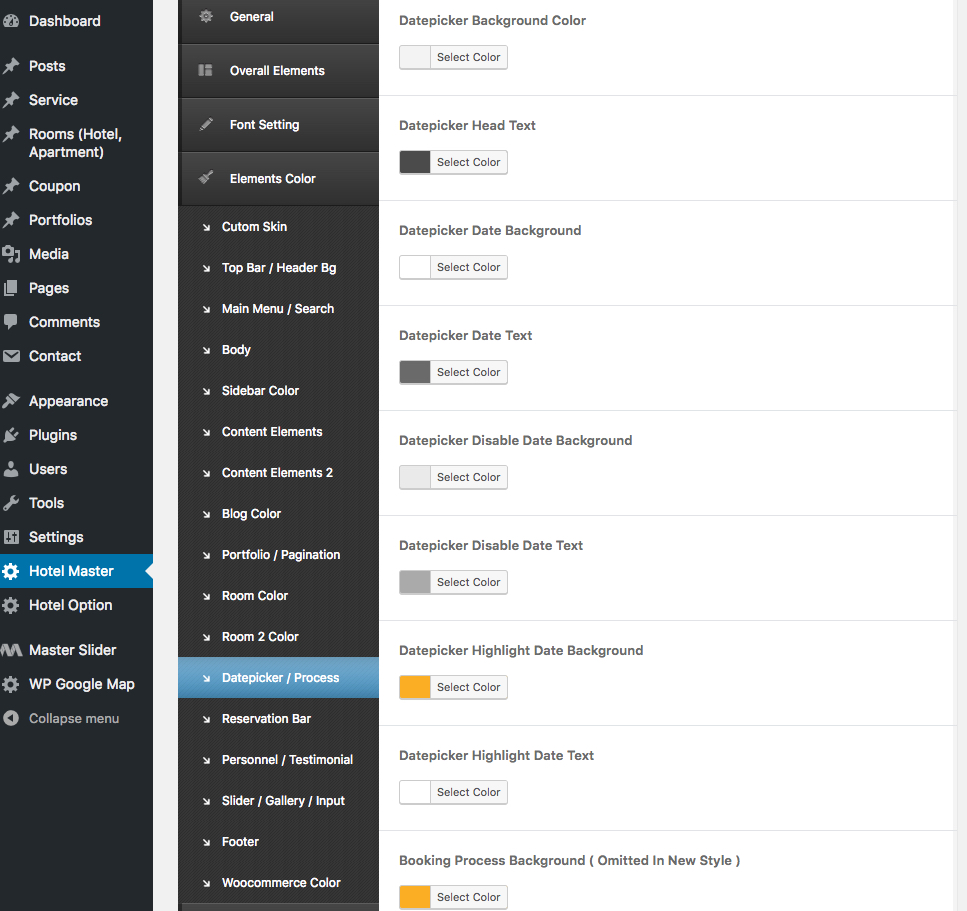
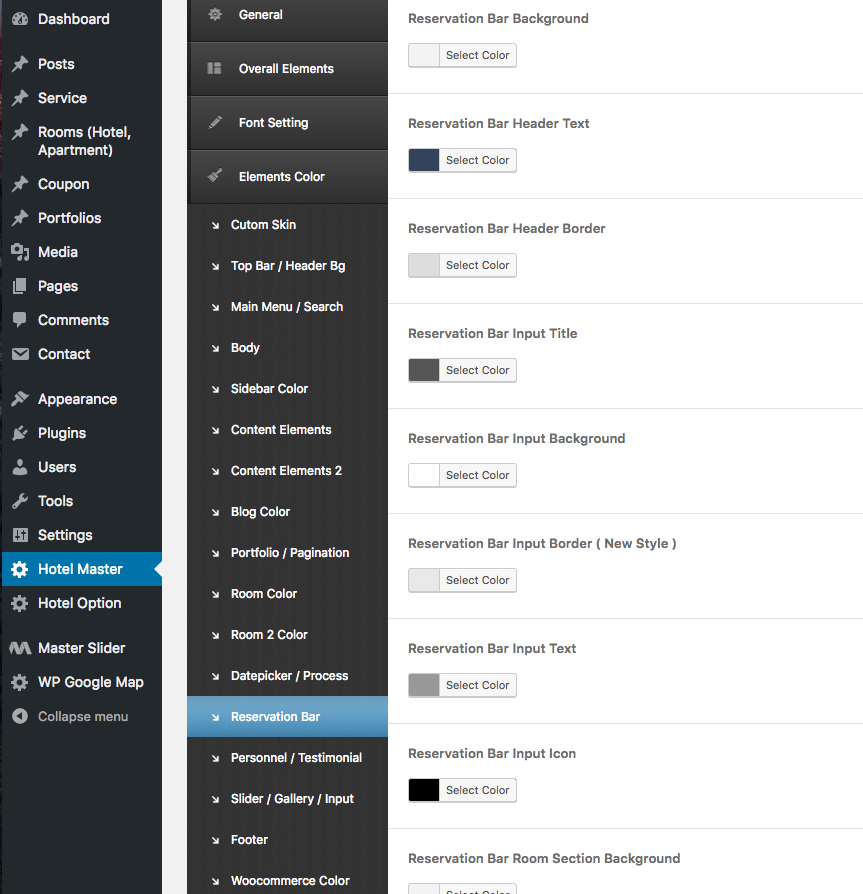
After switing between these two styles, make sure that you change the colors in 'Date Picker / Process' and 'Reservation Bar' as well.
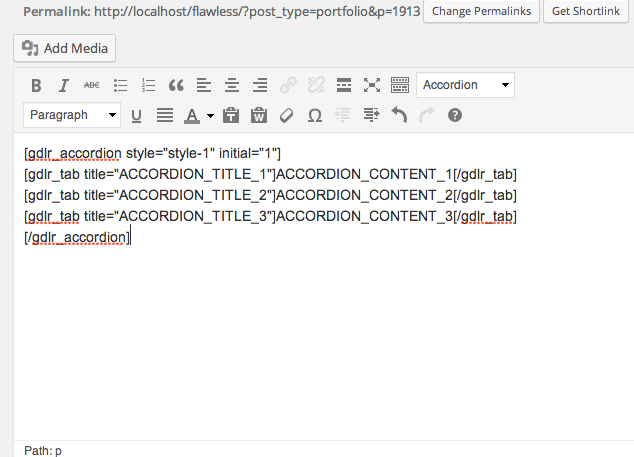
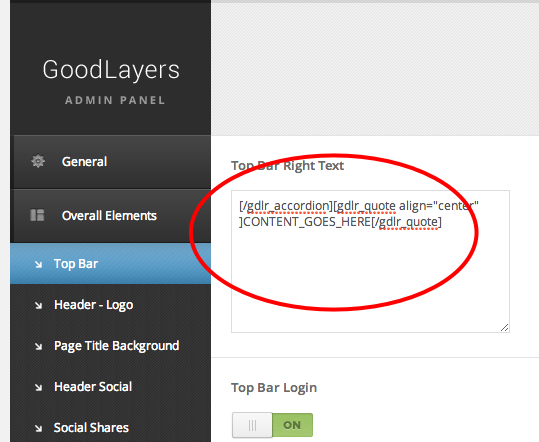
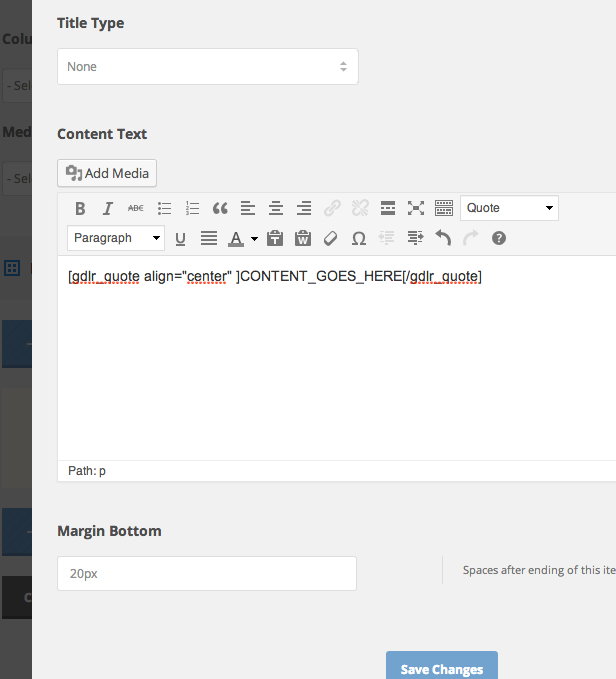
Shortcodes
Complete Shortcodes List Available Here
http://demo.goodlayers.com/hotelmaster/corporate/typography/Or You can use shortcodes easily by clicking on shortcode generator button.
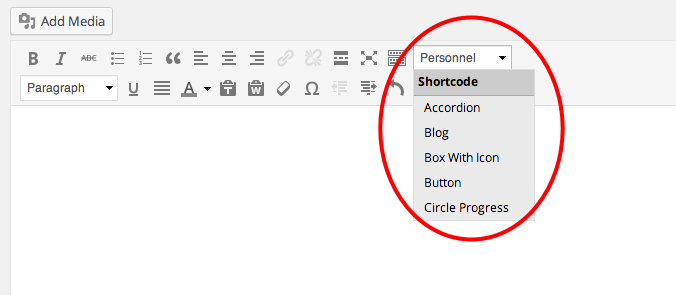
You can also put it in any content/text area.
Thumbnail Size
There're several predefined thumbnail size in our theme. Which you will be able to select it at 'Thumbnail Size' option in theme option, blog item, portfolio item, etc.You can add, change and delete the size by going to function-size.php file. At the top, you'll see $gdlr_thumbnail_size variable
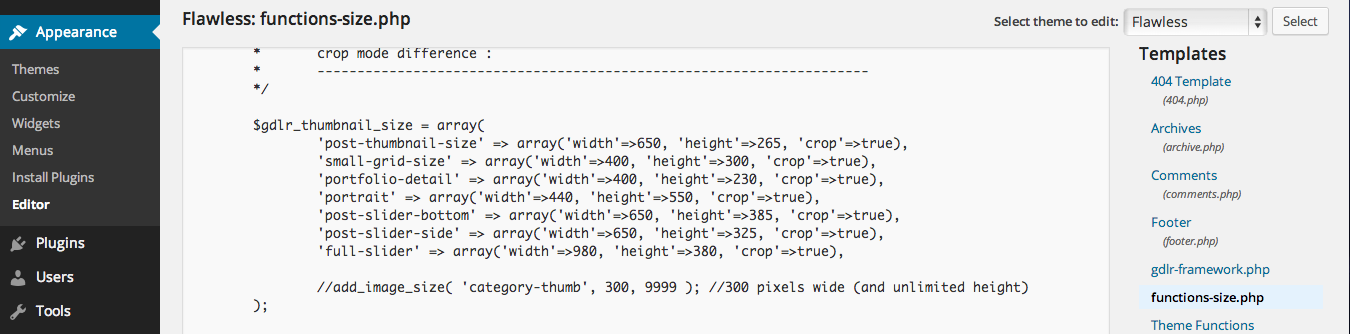
Try adding ( removing or changing ) new size by adding the line of code in this format.
'SIZE_NAME' => array( 'width'=>'NUMBER', 'height'=>'NUMBER', 'crop'=>true ),Since the changes only effects the newly uploaded images, after you successfully changed the image size, you may use the 'Regenerate Thumbnail' plugin to generate the thumbnail for old images as well.
Changing the thumbnail size via Child Theme
In case you want to modify the code via child theme, simply add this to function.php file of the child theme for this.
add_filter('gdlr-thumbnail-size', 'my_custom_image_size');
function my_custom_image_size( $size ){
	return array(
		'post-thumbnail-size' => array('width'=>650, 'height'=>265, 'crop'=>true),
		'small-grid-size' => array('width'=>400, 'height'=>300, 'crop'=>true),
		'portfolio-detail' => array('width'=>400, 'height'=>230, 'crop'=>true),
		'portrait' => array('width'=>440, 'height'=>550, 'crop'=>true),
		'post-slider-bottom' => array('width'=>650, 'height'=>385, 'crop'=>true),
		'post-slider-side' => array('width'=>650, 'height'=>325, 'crop'=>true),
		'full-slider' => array('width'=>980, 'height'=>380, 'crop'=>true),
	);
}
Changing Theme Color / Font
Changing Theme color
There're 2 ways to change the theme color- Theme option
- Wordpress Customizer
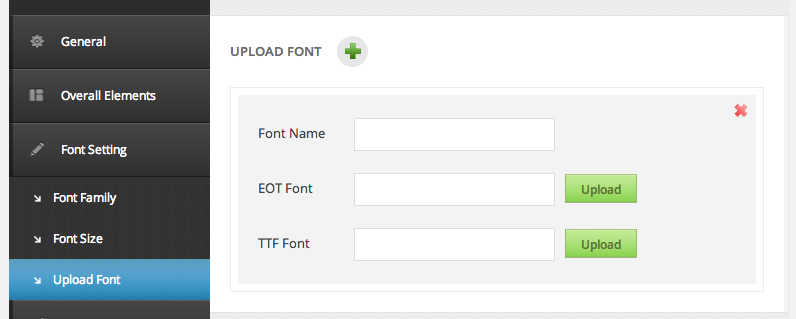
Font Size / Family
You can change the font size / family at the 'Theme option > Font Settings' area.To upload new font, go to 'Theme option > Font Settings > Upload Font' section. Add new font, fill the font name and upload the eot AND ttf font in the provided fields. ( Both font type are necessary for support of font among different browsers )
How to Update Theme
Recommended
If you bought from
GoodLayers.com · Automatic updates
Once your license is activated (see Install Theme), updates are fully automatic — no extra plugin needed.
- When a new version is available, WordPress shows it under Dashboard > Updates or Appearance > Themes. Just click Update.
- After updating the theme, also check GoodLayers > Install Plugins for any bundled-plugin updates.
If you bought from
ThemeForest
To update the theme,
You need to login to your Themeforest profile page, click on 'download' tab, then download the theme again.
After that,
Please also read 'Updating GoodLayers Plugin' and 'Updating Master Slider' if it get updated.
- After you downloaded file from Themeforest. Do not upload it yet. Extract it!
- You will find 6-7 folders and some files inside. You'll see the file called 'THEMENAME-vx-xx.zip'
- Upload this file through wp backend and activate the theme.
- After that go to 'appearance > menu' and assign menu location again then go to admin panel and click 'save changes'.
- Go to 'Appearance > Plugins', active Goodlayer plugin again.
Please also read 'Updating GoodLayers Plugin' and 'Updating Master Slider' if it get updated.
How to GoodLayers Plugins
Recommended
If you bought from
GoodLayers.com · Automatic updates
Bundled GoodLayers plugins update the same way as the theme — no manual re-download needed. When an update is available it shows up under Appearance > Install Plugins; just click Update.
If you bought from
ThemeForest
First of all, please note that you can't use this method with Master Slider.
- Go to 'Appearance > plugin', deactivate Goodlayers plugins and delete them. :

- After you delete them, you'll see this message :

Click on 'Begins installing plugins' - Install them and don't forget to activate too! :

How to update Master Slider
Recommended
If you bought from
GoodLayers.com · Automatic updates
Your slider plugin ships inside the same hotelmaster.zip package and updates automatically along with the theme — no separate FTP step needed.
If you bought from
ThemeForest
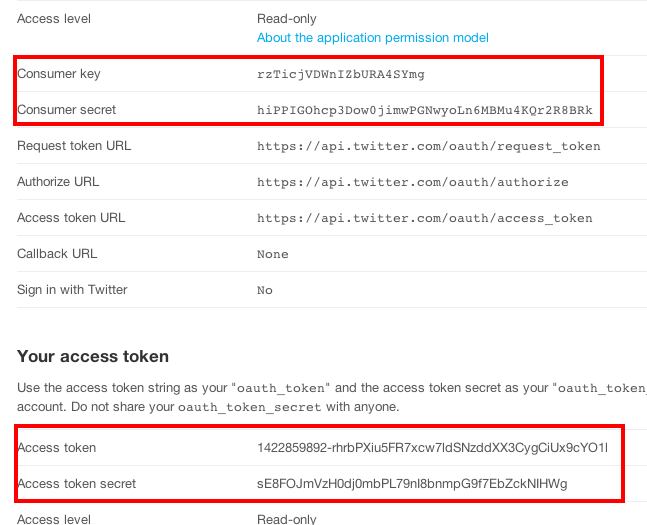
How to get twitter authentication info
There're 4 fields available when you use twitter widget. You have to follow these following steps to get all twitter access info for this.- Go to https://dev.twitter.com/apps
- Sign in on your twitter account
- Click 'Create New Application' button
- fill all required fields
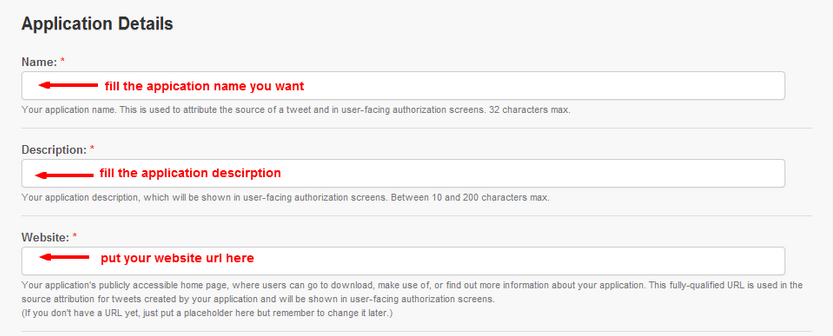
- Click the 'Create Access Token' button
- Fill the data you get on to the provided twitter info fields.
Setting Up Paypal Account
- Include the paypal payment option at the 'Hotel Option > Booking option'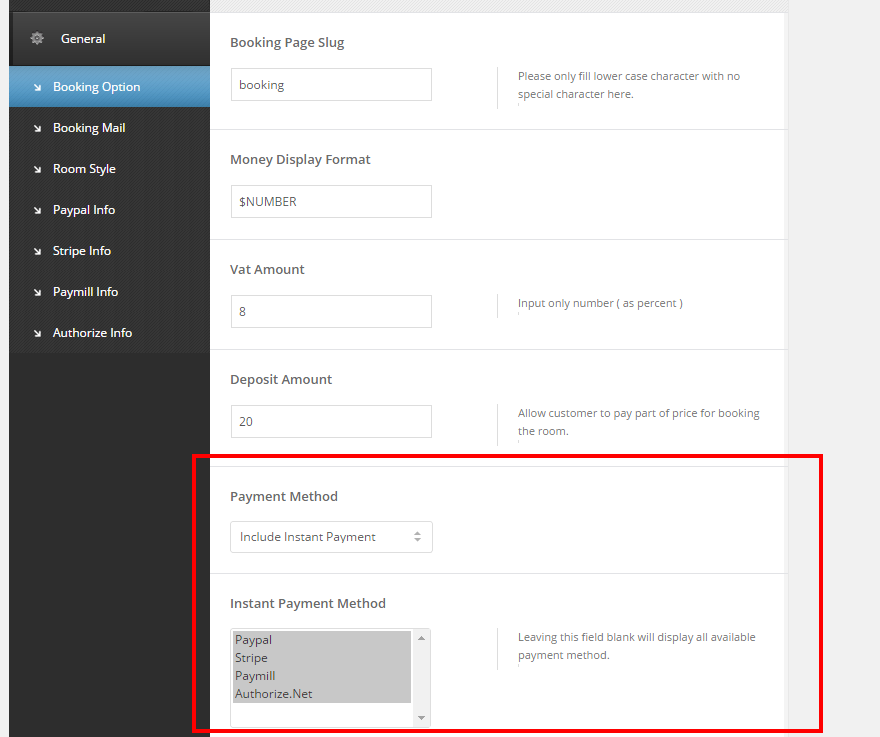
- Then go to 'Hotel Option > General > Paypal Payment' to set the paypal value
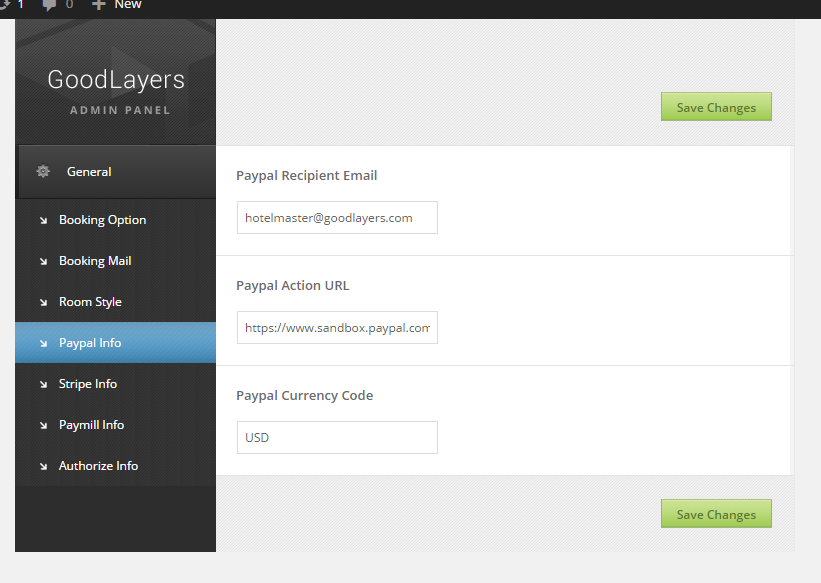
- You can see paypal currency list here. https://developer.paypal.com/docs/classic/api/currency_codes/
Testing Paypal
Sandbox is a test paypal platform that helps you setting up the test environment. You can register the developer and create sandbox account hereTo Test the sandbox account you have to change the paypal action url to https://www.sandbox.paypal.com/cgi-bin/webscr instead of https://www.paypal.com/cgi-bin/webscr
DON'T FORGET TO CHANGE IT BACK TO NORMAL PAYPAL ACCOUNT AFTER THE TESTING IS DONE TOO.
Setting Up Stripe Account
- Include the stripe payment option at the 'Hotel Option > General > Payment Option'- Go to this url and logging in to your stripe account to get the API Key https://dashboard.stripe.com/account/apikeys
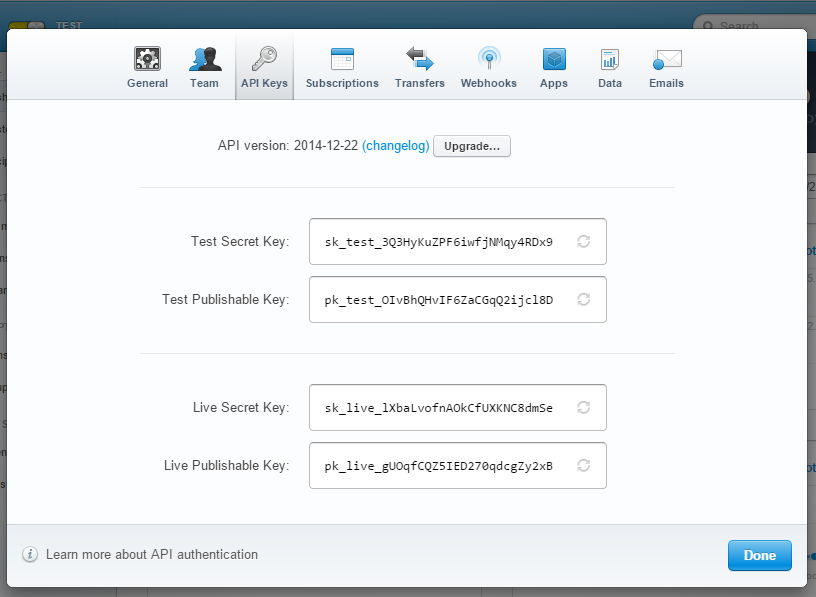
- Fill the stripe API infomation at the 'Hotel Option > General > Stripe Payment' area
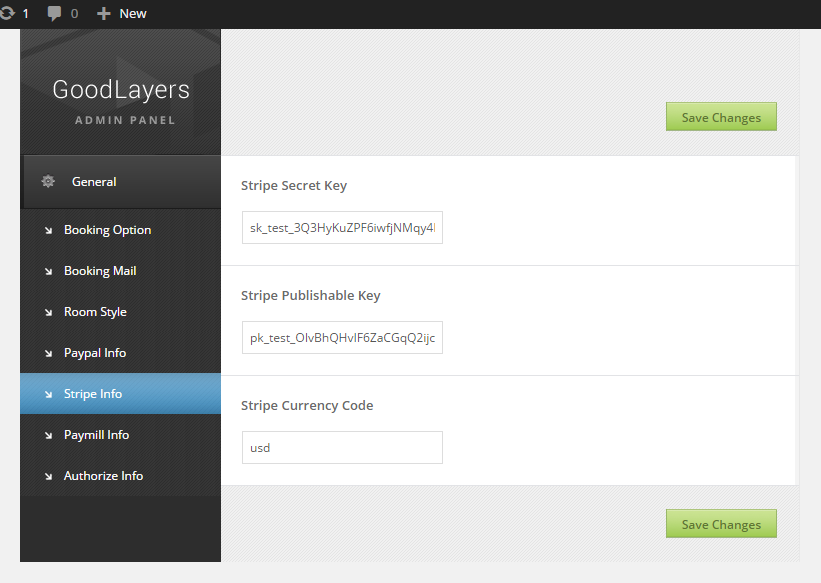
- If you fill the test key, you can the test card from this link https://stripe.com/docs/testing
Setting Up Authorize Account
- Include the authorize payment option at the 'Hotel Option > General > Payment Option'- You can test the authorize by creating the account in sandbox mode ( https://sandbox.authorize.net/ )
- After logging in to your account, go to Account > API Login ID and Transaction Key to get your transaction key
- The hash value can be set at the MD5-hash menu ( you can fill any number you want )
The default secrect answer is set to 'Simon'
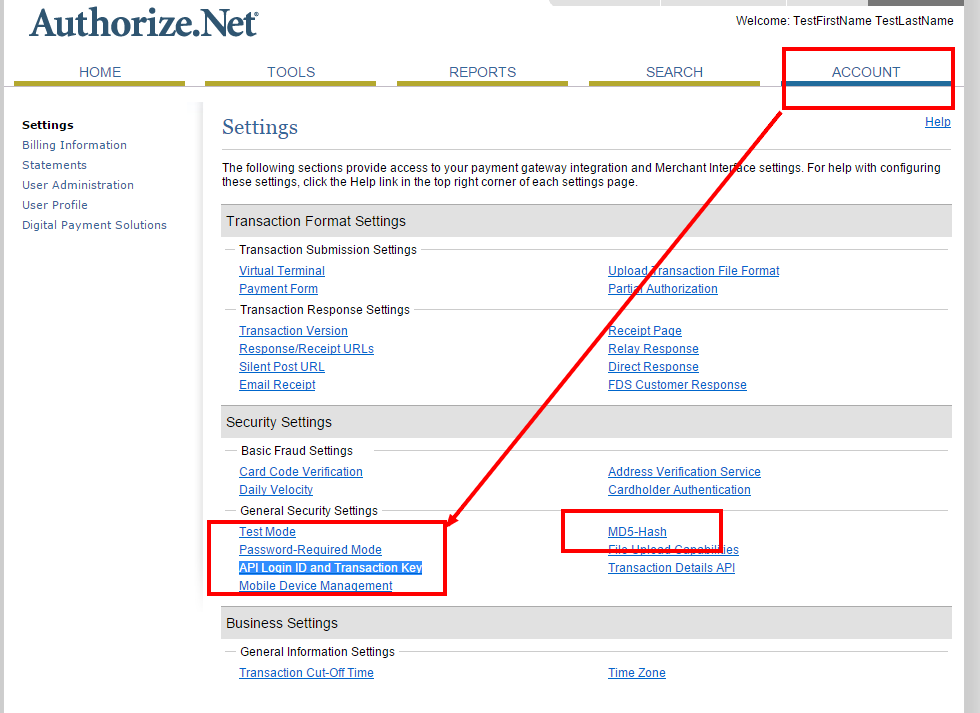
- Fill the authorize API infomation at the 'Hotel Option > General > Authorized.net Payment' area
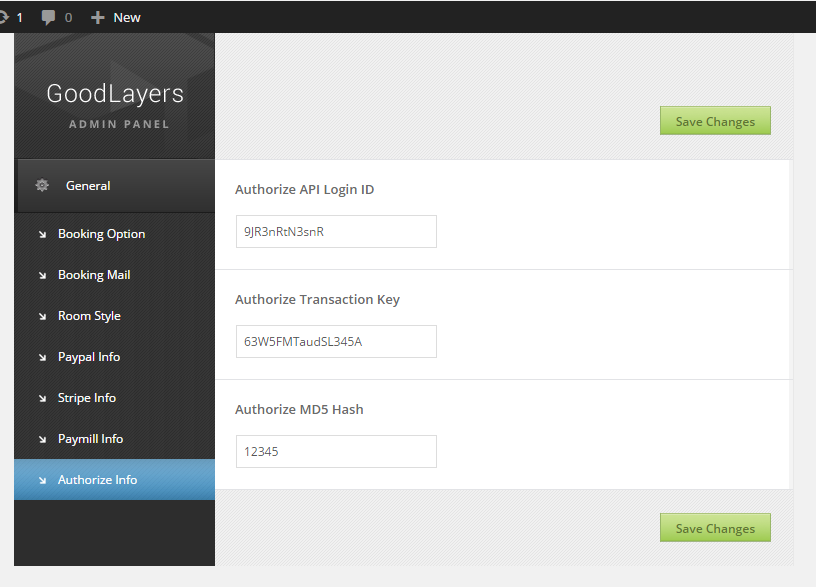
- You can get the test card number from this link http://developer.authorize.net/faqs/#testccnumbers
Snippet Code
Footer 1 : place this in text widget[gdlr_icon type="fa-phone" size="16px" color="#333"] +1800-222-3333 [gdlr_space height="-15px"] [gdlr_icon type="fa-envelope-o" size="16px" color="#333"] [email protected] [gdlr_space height="25px"] [gdlr_icon type="fa-facebook-square" size="24px" color="#333333"] [gdlr_icon type="fa-twitter-square" size="24px" color="#333333"] [gdlr_icon type="fa-linkedin-square" size="24px" color="#333333"] [gdlr_icon type="fa-google-plus-square" size="24px" color="#333333"] [gdlr_icon type="fa-pinterest-square" size="24px" color="#333333"] [gdlr_icon type="fa-flickr" size="24px" color="#333333"]Footer 3 : place this in text widget
Copyright Left : place this at 'Theme option > Overall elements > Copyright'[gdlr_space height="20px"] Maecenas sed diam eget risus varius blandit sit amet non magna. Lorem ipsum dolor sit amet, consectetur adipiscing elit. Donec sed odio dui. Nullam id dolor id nibh ultricies vehicula ut id elit. Vestibulum.
Home|Booking | About | ContactContact Page Info : place this in text widget
[gdlr_icon type="fa-map-marker" size="16px" color="#444444"]184 Main Collins Street West Victoria 8007

[gdlr_icon type="fa-phone" size="16px" color="#444444"] 1800-222-222

[gdlr_icon type="fa-envelope" size="16px" color="#444444"] [email protected]

[gdlr_icon type="fa-clock-o" size="16px" color="#444444"] Everyday 9:00-17:00
Contact Page Social : place this in text widget
[gdlr_icon type="icon-facebook" size="28px" color="#444444"] [gdlr_icon type="icon-twitter" size="28px" color="#444444"] [gdlr_icon type="icon-dribbble" size="28px" color="#444444"] [gdlr_icon type="icon-pinterest" size="28px" color="#444444"] [gdlr_icon type="icon-google-plus" size="28px" color="#444444"] [gdlr_icon type="icon-instagram" size="28px" color="#444444"]Single Room Content : place this in content editor
Room Details
Donec sed odio dui. Donec sed odio dui. Aenean eu leo quam. Pellentesque ornare sem lacinia quam venenatis vestibulum. Curabitur blandit tempus porttitor. Integer posuere erat a ante venenatis dapibus posuere velit aliquet. Etiam porta sem malesuada magna mollis euismod. Cras justo odio, dapibus ac facilisis in, egestas eget quam. Etiam porta sem malesuada magna mollis euismod. Maecenas sed diam eget risus varius blandit sit amet non magna.Praesent commodo cursus magna, vel scelerisque nisl consectetur et.

[gdlr_space height="40px"]
[gdlr_divider type="thick"]
[gdlr_space height="-20px"]

[gdlr_row]
[gdlr_column size="1/3"]The Space[/gdlr_column]
[gdlr_column size="1/3"]Accommodates : 4

Bathrooms : 1

Bedroom : 1

Beds : 1
[/gdlr_column]
[gdlr_column size="1/3"]Check In : 02:00 PM

Check Out : 12:00 PM

Property Type : Apartment / Room
[/gdlr_column]
[/gdlr_row]

[gdlr_space height="10px"]
[gdlr_divider type="thick"]
[gdlr_space height="-20px"]

[gdlr_row]
[gdlr_column size="1/3"]Amenities[/gdlr_column]
[gdlr_column size="1/3"]Wifi : Free

Elevator : No

Hair Dryer : Yes

Air Conditioning : Yes
[/gdlr_column]
[gdlr_column size="1/3"]Parking : $20 / Car / Night

Safety Box : Yes

Television : Yes
[/gdlr_column]
[/gdlr_row]

[gdlr_space height="10px"]
[gdlr_divider type="thick"]
[gdlr_space height="-20px"]

[gdlr_row]
[gdlr_column size="1/3"]Prices[/gdlr_column]
[gdlr_column size="1/3"]Extra people : From $50 / night
after 2 guests

Cleaning Fee : $17

[/gdlr_column]
[gdlr_column size="1/3"]Security Deposit : $50

Weekly Discount : 10%
[/gdlr_column]
[/gdlr_row]

[gdlr_space height="10px"]
[gdlr_divider type="thick"]
[gdlr_space height="-20px"]

Photos

[gallery columns="4" link="file" caption="no" thumbnail_size="small-grid-size" ids="3511,3512,3510,3519,3518,3533,3531,3532"]

[gdlr_space height="10px"]
[gdlr_divider type="thick"]
[gdlr_space height="-10px"]

Description

Aenean eu leo quam. Pellentesque ornare sem lacinia quam venenatis vestibulum. Vivamus sagittis lacus vel augue laoreet rutrum faucibus dolor auctor. Vivamus sagittis lacus vel augue laoreet rutrum faucibus dolor auctor. Cum sociis natoque penatibus et magnis dis parturient montes, nascetur ridiculus mus. Cras justo odio, dapibus ac facilisis in, egestas eget quam. Sed posuere consectetur est at lobortis. Etiam porta sem malesuada magna mollis euismod.

Cras justo odio, dapibus ac facilisis in, egestas eget quam. Sed posuere consectetur est at lobortis. Praesent commodo cursus magna, vel scelerisque nisl consectetur et. Curabitur blandit tempus porttitor. Cum sociis natoque penatibus et magnis dis parturient montes, nascetur ridiculus mus. Cum sociis natoque penatibus et magnis dis parturient montes, nascetur ridiculus mus. Cras justo odio, dapibus ac facilisis in, egestas eget quam.

[gdlr_space height="40px"]
[gdlr_divider type="thick"]
[gdlr_space height="-20px"]

Location

Address : 246 Vauxhall Bridge Rd, Westminster, London SW1V 1AU, UK
Phone : +44 20 8764 9834
[email protected]

[put_wpgm id=1]